How to Clean Orange Mold Fast: A Step-by-Step Guide

How To Get Rid of Orange Mold?
Wondering how to clean orange mold? Start by scrubbing it off with the right cleaner, drying the area completely, and fixing any moisture issues.
Orange mold is a stubborn, slimy nuisance that loves warm, damp spots like your shower walls or under the sink. It often appears in shades of orange, rust, or salmon. While it may not be as infamous as black mold, it can still stain, smell, and even trigger mild allergies especially if it spreads.
With the right approach, you can remove orange mold safely, thoroughly, and prevent it from returning.
In this guide, you’ll learn:
What Is Orange Mold and Why It Grows
Orange mold is not a single, uniform organism. In fact, a review from 2022 on slime molds (myxomycetes) states that many mold species show bright colors, including orange, red, yellow.
The actual species can vary depending on location, substrate, humidity, and lighting conditions. In some cases, the “orange” appearance is due to spores, pigmentation, or compounds produced by the fungus.
Conditions That Favor Orange Mold
For most molds (regardless of color), three essentials are required:
- Moisture or elevated humidity — Mold thrives when surfaces remain damp (e.g., due to leaks, condensation, spills, or poor ventilation).
- Organic or nutrient sources — Wood, drywall, paper, fabric, adhesives, wallpaper glue, and dust all serve as feeding grounds.
- Stagnant or poor airflow — Without fresh air circulation, moisture lingers and spores settle easily.
Orange mold types often show up where water is periodic or hidden. They’re usually behind tile, in corners, under sinks, or within humidifiers and dehumidifiers. Warm climates or warm indoor environments accelerate mold growth by speeding up spore germination. An academic review from 2023 on factors promoting indoor mold backs this up, citing that relative humidity, temperature, and moisture are key drivers.
Though often dismissed as “just orange mold” (less dramatic and scary than black mold), some strains can produce allergens, irritants, or compounds harmful to sensitive individuals. Even when not overtly toxic, mold can degrade building materials and become a chronic nuisance if ignored.
How to Detect Orange Mold in Your Home
You want to catch the mold before it becomes a full-blown infestation.
Here’s how to find it and not mistake it for something harmless that you’ll just ignore.
Visual & Textural Indicators
- Color variety: Bright orange, rust-like, salmon, muted orange, or sometimes a yellow-orange blend.
- Texture: Could be slimy (wet and slick), crusty (dried residue), slightly fuzzy (on porous surfaces), or smudgy.
- Boundary behavior: The edges are rarely neat; they blend, fade, or feather into surrounding material.
- Subsurface hints: Discoloration deeper than surface (e.g. backing felt on wallpaper or moisture shadow behind drywall).
- Smell: A persistent, damp, earthy or musty odor even after cleaning other areas might hint at hidden mold.
- Pattern: Clusters, streaks, halo effects (lighter center, darker edges), or streaks following water paths.
Common Hideouts (Your Home’s Mold Blind Spots)
You might think you’ve checked everywhere, but orange mold is sneaky. It loves to settle into corners and cracks that barely get a second glance.
Before you declare your home mold-free, take a closer look at these commonly overlooked spots:
- Bathrooms/showers/tubs: Behind grout, under caulk lines, around faucets, in shower drains, behind tiles.
- Kitchens/under-sinks: Cabinets, the underside of sinks, poorly ventilated corners, behind appliances.
- Basements/crawl spaces/attics: Poor insulation, low ceilings, wood beams, joists, insulation, stored items.
- Walls & drywall: Especially where a leak occurred earlier. Wallpaper backing, behind wall-mounted shelves, and panels.
- Windowsills/ frames/trim: Condensation zones, especially during temperature swings.
- Damp storage areas: Closets, cardboard boxes, fabrics, stored furniture that doesn’t breathe.
If you see an unexpected orange stain forming on a wall or ceiling, or a weird patch in a corner that appears wet or slick, treat it as a mold candidate right away.
How to Clean Orange Mold: Step-by-Step Guide
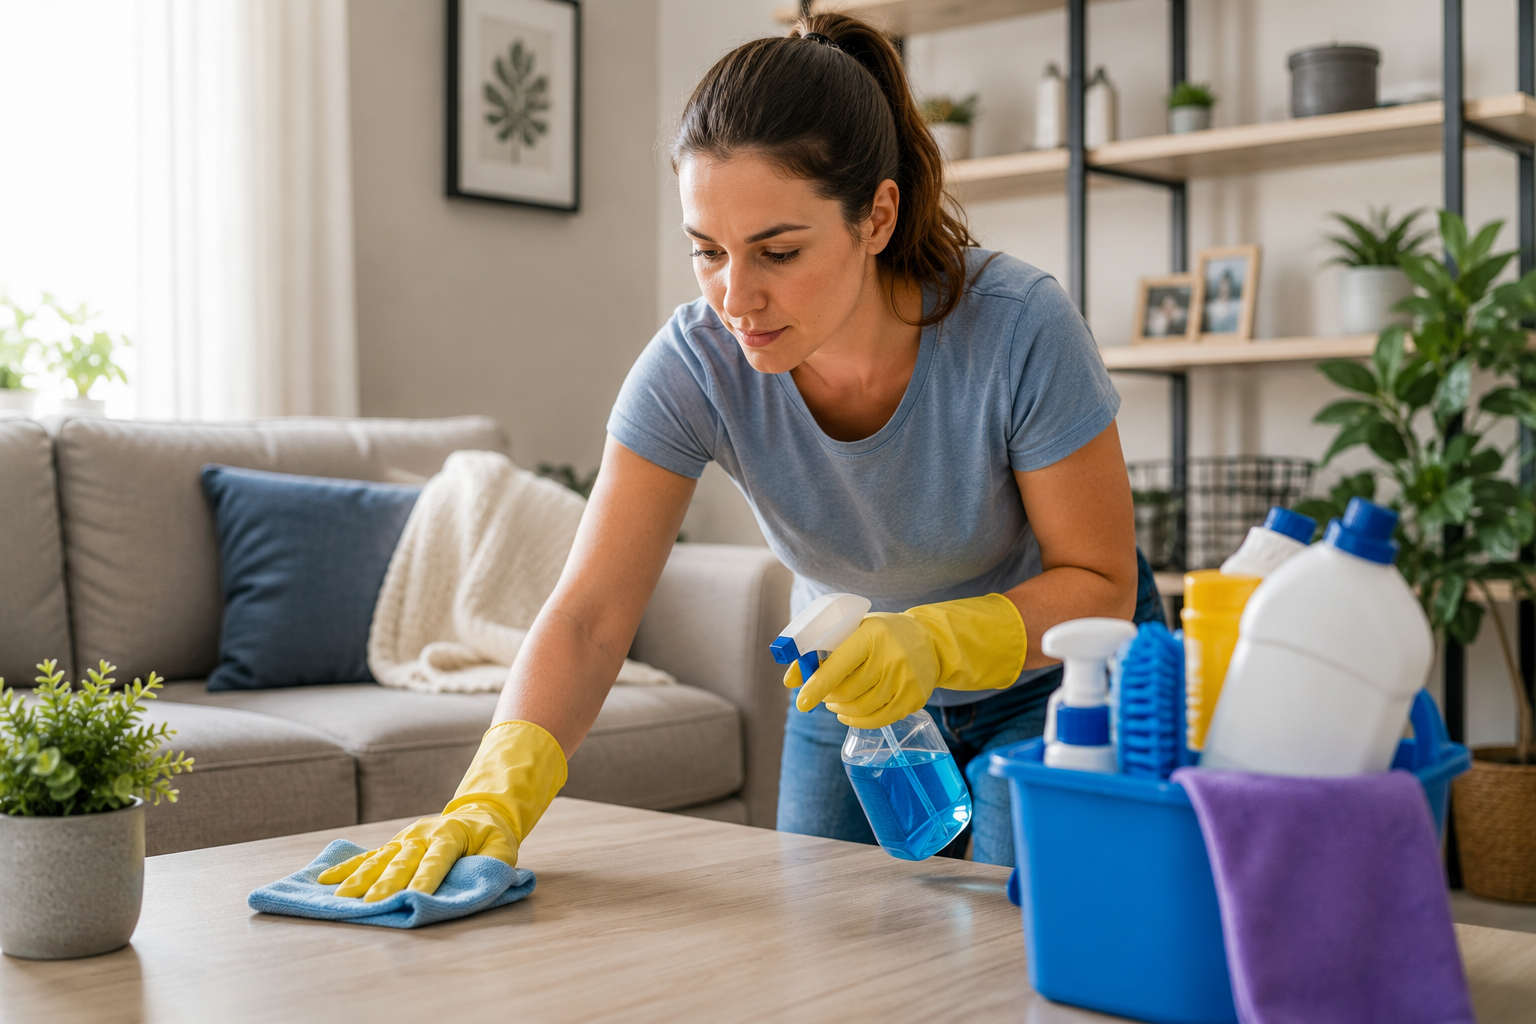
Before you start scrubbing like your deposit depends on it (because it might), make sure you’re properly prepared. Mold cleanup isn’t just about elbow grease but more about staying safe and preventing it from spreading like an unpaid intern doing too much.
Tools and Safety Gear You’ll Need
You’re not going to war, but it’s also not just a simple smudge.
Orange mold can release spores when disturbed, and those can float, land elsewhere, or irritate your body, especially your lungs, skin, and eyes. So here’s what to gather:
Personal Protective Equipment (PPE)
- Gloves: Nitrile or heavy-duty rubber gloves. Do not use the thin plastic kind.
- Respirator mask: The United States Environmental Protection Agency (EPA) recommends using at least an N95-rated mask. If you’re cleaning in a poorly ventilated area or are mold-sensitive, step it up to a P100 respirator.
- Eye protection: Non-vented goggles to prevent spores or splashes from getting in your eyes.
- Protective clothing: Long sleeves, long pants, and preferably something you can wash on hot or toss when done.
Cleaning Tools
- Spray bottles: For applying your mold-cleaning solution.
- Buckets: One for clean water, one for dirty water. It’s easier to move when you’re organized.
- Brushes: A soft-bristle for gentle surfaces, a medium-bristle for tougher areas.
- Sponges or microfiber cloths: For wiping and blotting.
- Trash bags: Use them to bag anything you dispose of (rags, moldy materials).
Environmental Control
- Plastic sheeting and painter’s tape: To seal off the area and keep spores from spreading.
- Box fan or exhaust fan: Helps to vent air outside, not into your hallway.
- Dehumidifier: Speeds up the drying process post-cleaning.
- HEPA vacuum (optional): If you’re cleaning after removing porous mold-damaged materials, this helps trap lingering spores.

Step-by-Step Instructions for Removing Orange Mold
Once you’re geared up and your area is prepped, it’s time to tackle the actual mold.
Follow these steps methodically, and you minimize the risk of spread or regrowth.
Step 1: Isolate the Affected Area
Containment isn’t overkill. It should be common sense and your first thought. Mold spores are microscopic and go airborne easily.
Use plastic sheeting and painter’s tape to seal off the cleaning area, especially if you’re working indoors.
If possible:
- Close doors or hang plastic barriers to keep spores from drifting into other rooms.
- Run a box fan or exhaust fan pointing out a window to pull contaminated air away from your living space.
- Turn off HVAC systems while cleaning to avoid spreading spores.
Step 2: Remove Any Loose or Heavily Contaminated Materials
If you see mold on porous materials like cardboard, ceiling tiles, drywall, or insulation, you may need to discard those pieces, as recommended by a University of Georgia article. Unfortunately, once mold penetrates deep into porous material, it’s almost impossible to remove completely.
Wrap and seal the materials in heavy-duty trash bags. Don’t drag them through the house because spores will take the grand tour.
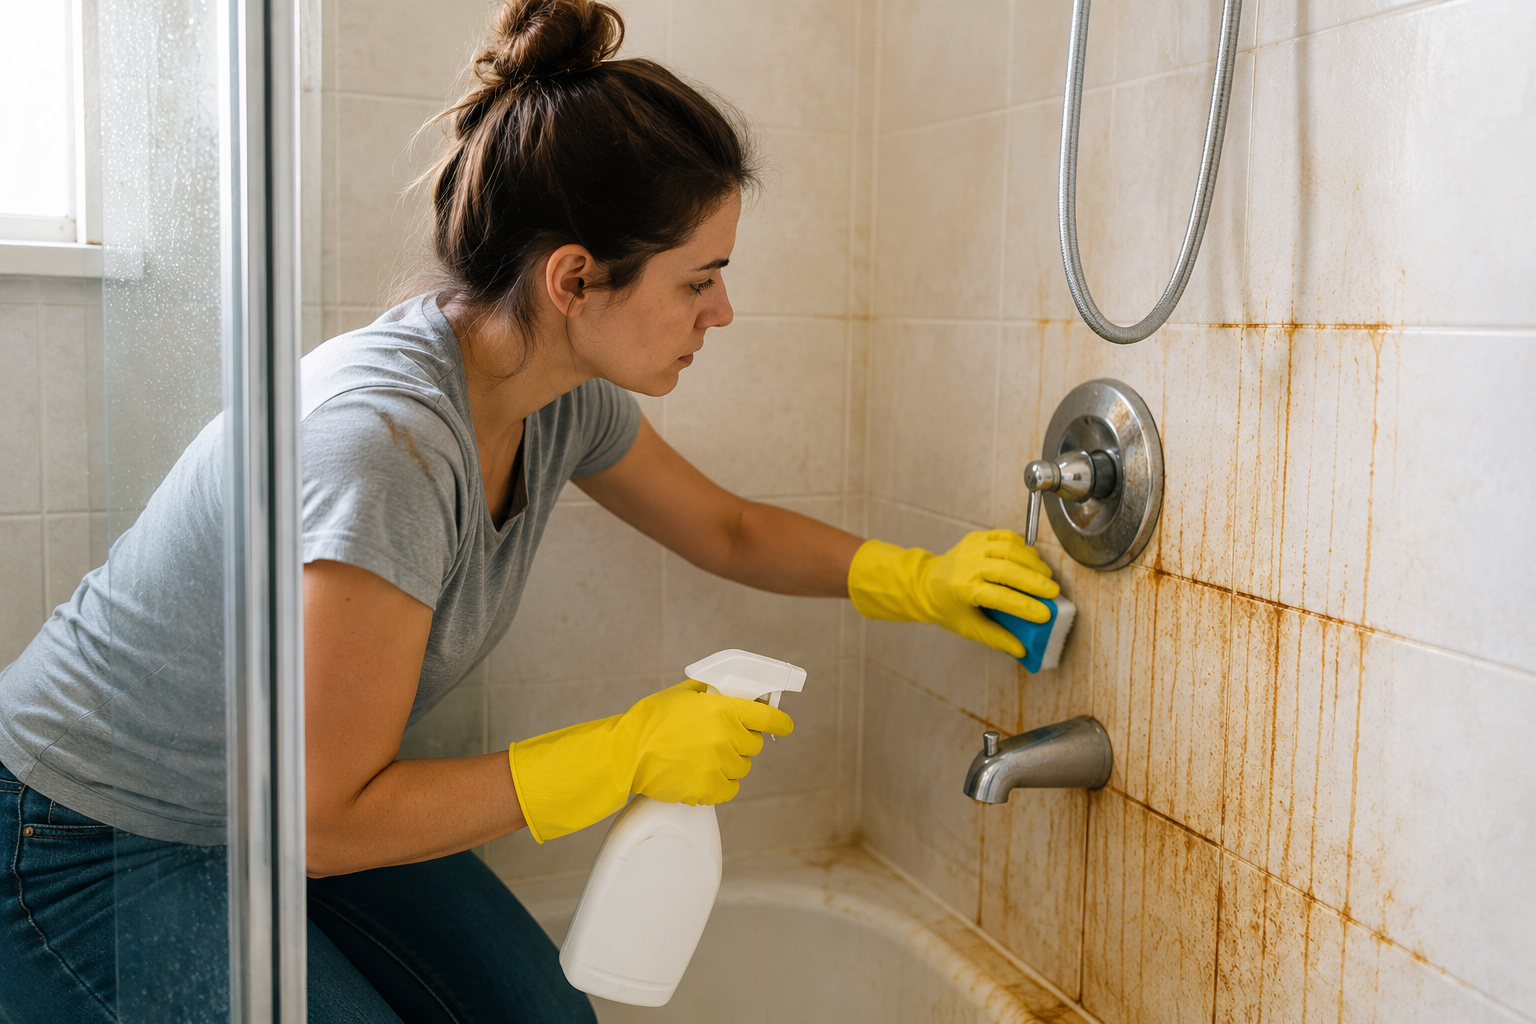
Step 3: Apply Your Cleaning Solution
After you’ve isolated the area and donned your gear, it’s time to attack the orange mold. It’s important to use the right cleaner (no, plain water won’t cut it) for the highest effectiveness.
Below are some of the best approaches, each with its own strengths.
Use a Commercial Mold Cleaner
If you want a “grab and go” solution, a commercial mold cleaner is your best bet. These products are formulated specifically for fungi and often include antifungal or antimicrobial agents that help prevent regrowth.
- Follow the label instructions exactly (strength, contact time, rinsing).
- Ideal for non-porous surfaces such as tiles, glass, or sealed wood.
- Some products also leave a light protective barrier, making future mold growth harder.
DIY Vinegar Solution
Good old vinegar remains a favorite home remedy. Its mild acidity disrupts the structure of many mold species without introducing harsh chemicals into your home.
- Mix white vinegar and water 1:1 in a spray bottle (use full-strength vinegar for stubborn patches).
- Spray directly onto the affected area until it’s fully wet.
- Great for both porous and non-porous surfaces, though it may leave a slight smell at first.
Hydrogen Peroxide (3%)
Hydrogen peroxide is an underrated mold killer and unlike bleach, it actually penetrates surfaces rather than just bleaching the stain.
- Use a 3% hydrogen peroxide solution directly from the bottle or spray it on.
- Let it fizz for several minutes; that bubbling isn’t only satisfying to look at, but it’s also breaking down spores
- Works especially well on bathroom surfaces, grout, and even fabrics (test first for colorfastness).
Baking Soda Paste for Stubborn Spots
Sometimes mold is entrenched in grout or textured surfaces where liquid solutions slide off. That’s where baking soda comes in.
- Mix baking soda with a small amount of water to form a paste.
- Apply it with a brush directly to the moldy area and scrub gently but firmly.
- Baking soda not only loosens mold but also absorbs moisture, creating a less hospitable surface afterward.
Pro Tip: Let it sit. No matter which solution you choose, the magic isn’t in just spraying but in waiting. Allow the cleaner to sit for 10–15 minutes so it can break down mold structures and kill active spores.
Step 4: Scrub Like You Mean It
Once the cleaning solution has had time to do its work, grab your brush and get to it.
Choose the right type of brush for the surface you’re working on. For example, a soft-bristled brush is best for delicate materials like tile or painted drywall. On the other hand, a firmer brush should be used for tougher surfaces like concrete or unfinished wood.
Scrub in tight circular motions, focusing on discolored or textured areas where mold clings. As the mold begins to lift, wipe the area repeatedly with a clean sponge or a damp cloth to remove the loosened residue. If the surface allows, rinse with clean water or go over it with a fresh damp rag to get rid of any remaining cleaning solution.
Step 5: Dry the Area Thoroughly
After cleaning, drying is the single most important step. Even if the area looks spotless, lingering moisture can trigger a mold comeback in less than 48 hours.
Speed up the drying process by running fans, setting up dehumidifiers, or simply opening windows to let air circulate.
In tight spots, like behind sinks or under appliances, direct airflow with a portable heater or a focused fan to ensure moisture doesn’t get trapped. Keep the area dry for at least 24 hours and continue to monitor it for any signs of dampness or regrowth.
Step 6: Dispose of Contaminated Waste Carefully
Used cloths, disposable gloves, scrubbers. All of these should go straight into a sealed trash bag. If you used washable items, run them through a hot wash cycle with detergent and, if possible, dry on high heat.

Maintaining a Mold-Free Home: Ongoing Care Tips
You’ve cleaned the orange mold. That’s great! You’re finally free of the orange eyesore. But unless you want it reappearing like a bad sequel, it’s time to take prevention seriously.
Mold is persistent. If your home keeps offering the conditions it likes, it’ll come right back. Here’s how to keep your space permanently off-limits to mold.
A. Control Indoor Humidity
Orange mold thrives in humidity above 50%. Your goal? Keep it under that. The EPA recommends keeping humidity between 30 to 50%.
Invest in a good dehumidifier, especially in high-risk areas like basements, bathrooms, or laundry rooms. If your mirrors fog up from a hot shower or your windows develop condensation, your indoor climate is basically a mold resort. Time to shut that down.
B. Improve Air Circulation
Beyond moisture, mold also loves still, stale air.
Use exhaust fans in bathrooms and kitchens, and crack open windows when the weather allows. Ceiling fans help too, especially in rooms that tend to feel stuffy.
Don’t crowd furniture against walls, and avoid sealing off rooms entirely because mold adores forgotten corners.
C. Fix Leaks Immediately
A slow drip might not seem urgent, but to mold, it’s a steady food delivery. Leaky faucets, pipes, rooflines, or window seals can create a constant damp zone.
If you see water stains, bubbling paint, or discoloration, don’t wait for it to get worse.
D. Use Mold-Resistant Materials
If you’re remodeling or repairing water-damaged areas, go for mold-resistant drywall, green board, or anti-fungal paints. These materials don’t guarantee immunity, but they make it significantly harder for mold to get comfortable.
E. Store Items Smartly
Keep cardboard boxes, books, papers, and fabrics off the floor and away from exterior walls. Use sealed plastic bins for storage in crawl spaces or basements.
Mold can and will grow on your childhood photo albums if given half a chance. Give your stored items room to breathe.
F. Regularly Inspect and Clean High-Risk Areas
Make a monthly mold patrol part of your cleaning routine. Check under sinks, behind toilets, around windowsills, inside closets, and any place where moisture and poor airflow might intersect.
If you catch even a hint of that musty odor, don’t ignore it. Even if it might not be mold, there’s obviously a problem if something smells off.
Roochii Cleaning has helped dozens of homeowners catch and clean mold problems early. Just last month, we worked with a client who thought the smell in their laundry room was “just old pipes.” Turns out, orange mold was building up behind their utility sink due to a slow leak they never noticed. Our deep cleaning team removed the mold, treated the area, and made moisture-control improvements. Their home has been mold-free since.
If you’re unsure what you’re seeing or smelling, reach out. Professional cleaning teams can assess, clean, and help prevent future mold growth, so you don’t have to second-guess it.
Health Impacts of Orange Mold Exposure
Mold is more than just an aesthetic problem. Yes, it’s an eyesore, but more that that, orange mold is a health concern even if it doesn’t seem like it.
A. Allergic & Respiratory Reactions
- Sneezing, runny or stuffy nose
- Itchy, red or watery eyes
- Throat irritation, coughing, wheezing
- For asthma sufferers, mold exposure often worsens symptoms, triggering flare-ups.
B. Chronic or Ongoing Exposure Consequences
- Prolonged exposure may contribute to headaches, fatigue, or difficulty concentrating (especially in sensitive individuals).
- Skin irritation or rashes in contact zones.
- In people with weakened immune systems or underlying lung conditions, mold exposure may pose higher risks, including possible infections in rare instances.
C. Structural & Material Damage
- Mold degrades building materials. Drywall, wood studs, insulation, adhesives all lose integrity over time.
- Cosmetic damage: stains, warping, peeling surfaces.
- Bad mold turnover lowers property value and may complicate future repairs or remodeling.
Because mold is invisible in many cases, health symptoms may precede visible signs. If unexplained respiratory or allergy issues emerge, a mold check may be in order.
Conclusion: Take Control of Orange Mold Today
Orange mold might look harmless at first, but let it hang around long enough and it becomes a costly, unhealthy, and frankly annoying guest in your home. The good news? You’ve now got everything you need to kick it out and keep it out.
From spotting it early to cleaning it safely and preventing it from returning, you now have a full playbook. Keep moisture in check, stay vigilant in mold-prone areas, and act quickly when you see signs.
Don’t just wait until mold shows up again to act. Mold-proofing your home is a maintenance habit, not a one-time fix. And if the orange menace returns? You’ll know exactly how to handle it without breaking a sweat (or a ceiling tile).
FAQ
FAQs On How to Remove Orange Mold
Not necessarily. While black mold gets fear attention, some orange molds can also produce allergens or, in rare cases, infections. It depends on species, exposure level, and individual sensitivity.
Bleach isn’t ideal for wood. Water in bleach can soak into the wood and feed mold deeper. Use safer alternatives or commercial mold cleaners made for wood surfaces.
Under ideal conditions (moisture, warmth, food source), mold can begin growing and spreading in 24–48 hours.
Yes. Even dried or killed mold spores can become airborne and trigger allergic or respiratory reactions. That’s why removing and discarding contaminated materials is key.
Every few months for high‑risk areas (bathrooms, basements, crawl spaces). After heavy rain, leaks, or floods, check promptly. Consistency is what keeps mold at bay.