How to Get Rid of Rust Stains in Shower Safely and Fast

Getting Rid of Rust Stains in the Shower
Trying to figure out how to get rid of rust stains in your shower and feeling frustrated because nothing seems to work? You’re not alone. Rust stains can range from light, surface-level discoloration to stubborn, deep-set marks that cling to tile, fiberglass, or porcelain. The good news? No matter the severity, there are effective ways to tackle them.
Different shower surfaces need different approaches, so it’s important to use the right method to avoid damage while still getting results.
Mild stains can often be lifted with gentle DIY treatments, while heavier rust may require more targeted products and a bit of extra effort. Either way, you’ll come away with a clear, practical action plan to restore your shower step by step.
Rust stains aren’t just unsightly. They’re usually a signal of underlying issues like hard water, excess moisture, or metal exposure. That’s why it’s just as important to prevent them from returning as it is to remove them in the first place.
With the right approach, even stubborn rust stains can usually be removed safely without damaging your shower surfaces.
Table of Contents
- Why Rust Stains Form in Showers
- How to Get Rid of Rust Stains in Shower Based on Severity
- Best Commercial Products for Rust Stains in Shower
- Surface-Specific Rust Removal Guide
- Step-by-Step Master Process for Removing Rust Stains in Shower
- Preventing Rust Stains in Shower Long-Term
- When Rust Stains Indicate a Bigger Problem
Why Rust Stains Form in Showers
Rust stains in showers and bathtubs don’t usually appear all at once. They build up gradually, even if they seem sudden.
At the core, these stains come from iron interacting with water and oxygen. However, it’s important to distinguish between iron staining and true corrosion, since they look similar but come from different sources.
Iron staining happens when iron particles in water settle on surfaces and oxidize, leaving behind orange or reddish marks. Corrosion, on the other hand, occurs when metal objects or plumbing break down and transfer rust directly onto surfaces.
Visually, iron stains tend to appear as light orange to rusty brown streaks or patches, while corrosion from objects often shows up as darker brown or even blackened marks, sometimes in rings or drip patterns.
A quick way to tell the difference: if the stains are widespread and appear wherever water dries, they’re likely water-based. If they’re concentrated under specific items or in distinct shapes, they’re usually caused by metal objects.
Understanding these differences helps you choose the right cleaning method and more importantly, stop the problem at its source.
A. Hard Water with High Iron Content
One of the most common reasons rust stains form is hard water that contains elevated levels of iron.
When iron-rich water dries on shower walls, tubs, or fixtures, it leaves behind mineral residue. Over time, this residue oxidizes and turns into the reddish-brown stains commonly seen on tile, grout, and porcelain surfaces. This is proven by a journal article about corrosion from 2022.
Homes that rely on well water are particularly prone to this issue, but municipal water supplies can also carry iron depending on local conditions.
B. Metal Objects Left in Wet Areas
Everyday bathroom items can also contribute to rust stains without us realizing.
Shaving cream cans, razors, shower caddies, and metal soap dishes can rust when left in standing water. As these items corrode, they transfer rust directly onto shower floors, tub edges, and shelves, often leaving circular or streak-like stains.
Removing metal items after use is one of the simplest ways to reduce rust buildup.
C. Aging or Corroded Plumbing
Rust stains may also be a sign of aging plumbing. Older homes with galvanized steel pipes can release iron particles into the water as pipes corrode internally. If rust stains appear suddenly or worsen quickly, plumbing corrosion may be contributing to the problem.
In these cases, cleaning the surface alone won’t fully solve the issue without addressing the source.
D. Constant Moisture and Poor Ventilation
Bathrooms naturally retain moisture, but inadequate ventilation allows water to linger on surfaces longer than it should. Prolonged dampness speeds up oxidation, making rust stains more likely to form.
Using exhaust fans and opening windows can significantly slow down the staining process.
How to Get Rid of Rust Stains in Shower Based on Severity
Rust stains vary in intensity, and using the wrong method can either waste time or damage the surface. Breaking the problem into levels helps you choose the most efficient solution.

Light Surface Rust Stains
Light stains usually appear as faint orange streaks or small patches. These are recent deposits that have not bonded deeply to the surface.
Two natural acids work well at this stage. White vinegar contains acetic acid, which dissolves mineral deposits, while lemon juice provides citric acid that breaks down rust.
Recommended methods:
- Spray undiluted white vinegar directly onto the stain.
- Apply salt, then rub with a freshly cut lemon to create mild abrasion and acidity.
- Allow the solution to sit for 10 to 15 minutes. This dwell time is enough to loosen the stain without affecting most surfaces.
- Use a soft sponge or microfiber cloth for agitation. Avoid stiff brushes at this stage, as they are unnecessary and may scratch finishes.
When to repeat: If the stain lightens but does not fully disappear, repeat the process once or twice. Light stains usually respond within two applications.
Moderate Rust Buildup
Moderate stains are darker, more widespread, and slightly embedded. These require a method that combines chemical action with gentle abrasion.
Baking soda works well because it is mildly abrasive and alkaline. When combined with hydrogen peroxide, it creates a stronger reaction that helps lift deeper stains.
Recommended method:
- Mix baking soda with water or hydrogen peroxide to form a thick paste.
- Apply the paste directly over the stained area.
- Let the paste sit for 20 to 30 minutes. This allows the mixture to penetrate and break down the rust particles.
- Do not allow the paste to dry completely. If needed, lightly mist the area to keep it active.
- After the dwell time, scrub gently using a soft-bristle brush or non-abrasive pad. Focus on consistent, light pressure rather than aggressive scrubbing.
How to avoid damage:
- Avoid excessive force on fiberglass and acrylic surfaces.
- Rinse thoroughly to prevent residue buildup.
This method is effective for most household rust stains without introducing harsh chemicals.
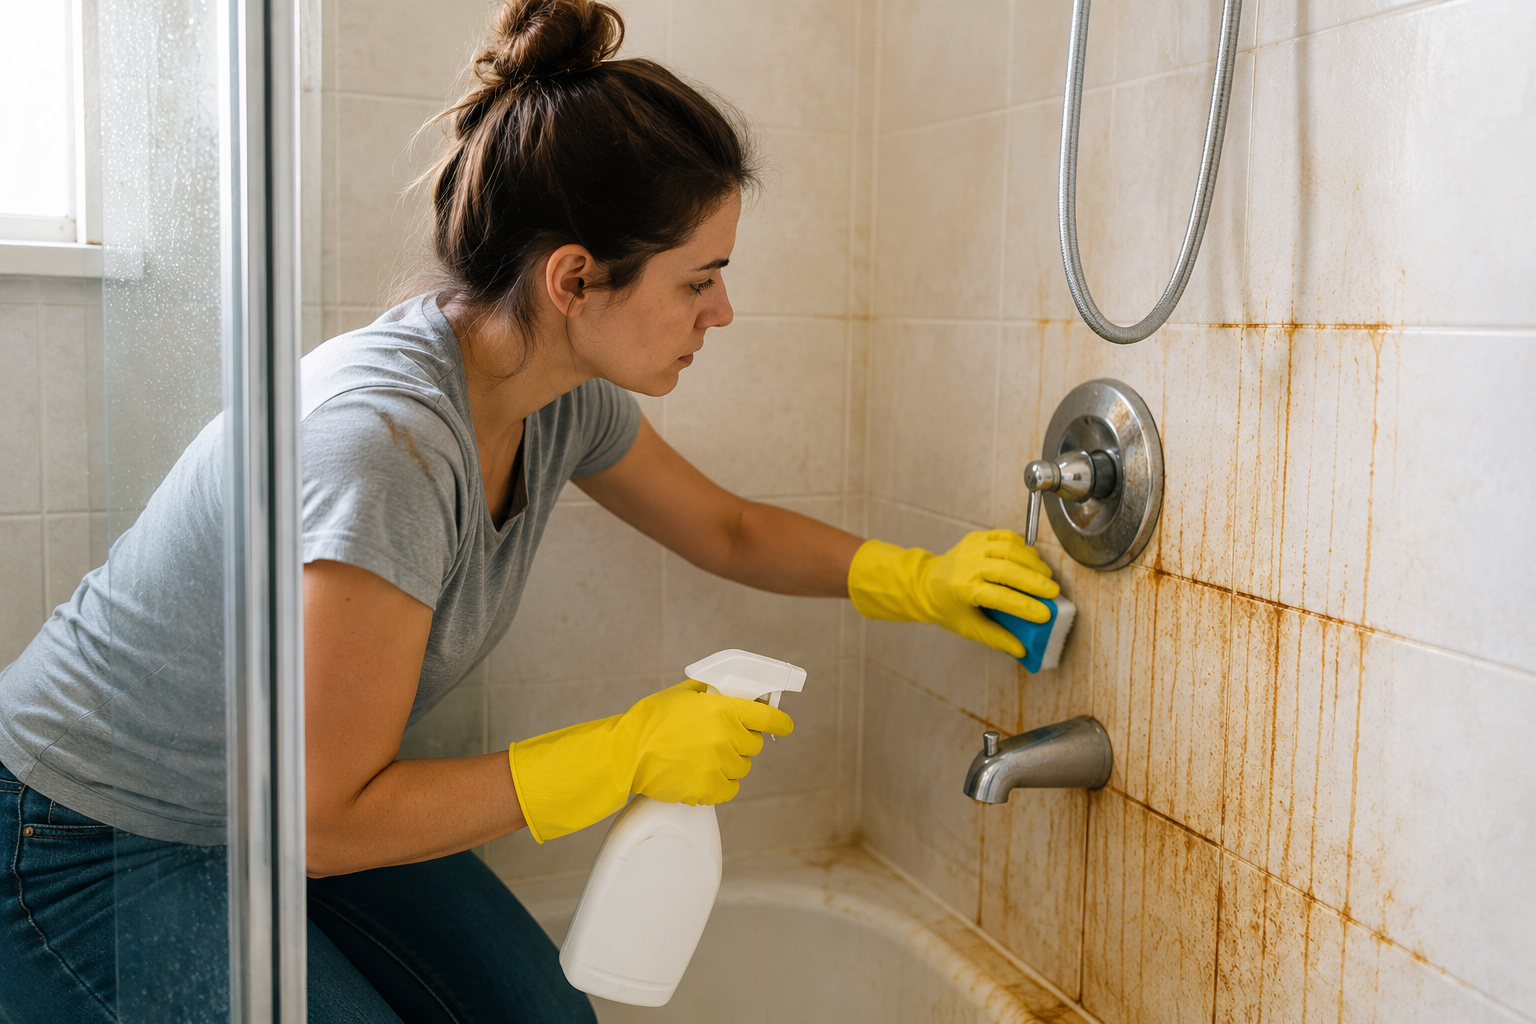
Deep or Set-In Rust Stains
Deep stains are typically dark brown, sometimes with a black tint, and are firmly embedded in the surface. These often develop over long periods or in areas with high iron content.
At this stage, natural methods may not provide sufficient results. Specialized chemical cleaners become necessary.
Recommended solutions:
- Oxalic acid-based rust removers
- Multi-purpose calcium, lime, and rust removers
Oxalic acid reacts directly with iron oxide, breaking it down at a chemical level. This makes it one of the most effective agents for severe rust stains.
Application approach:
- Apply the cleaner directly to the stain.
- Allow a short dwell time, typically 2 to 5 minutes.
- Rinse thoroughly and inspect results before repeating.
Safety instructions:
- Wear gloves and ensure good ventilation.
- Avoid mixing different chemical cleaners.
- Test on a small hidden area before full application.
When stains persist after multiple treatments, they may have penetrated beyond the surface layer. In such cases, full removal may require professional restoration.
Best Commercial Products for Rust Stains in Shower
Commercial rust removers are formulated to break down iron deposits faster and more consistently than most household methods. They are especially useful when stains are widespread, deeply embedded, or resistant to repeated natural treatments.
Choosing the right product depends on stain severity, surface material, and how quickly results are needed.
When to Choose Commercial Over Natural Methods
Natural solutions like vinegar or baking soda work well for light to moderate stains. However, they lose effectiveness as rust penetrates deeper into surfaces.
Consider switching to a commercial cleaner when:
- Stains remain after two or more cleaning attempts
- Rust covers large areas or multiple surfaces
- The stain has a dark brown or black tint
- You need faster, more predictable results
Commercial products are also useful in homes with high iron levels in water, where stains tend to return quickly.
Types of Commercial Rust Removers
Most rust cleaners fall into a few key categories based on their active ingredients.
Oxalic Acid-Based Cleaners
These are among the most effective for heavy rust stains. Oxalic acid reacts directly with iron oxide, dissolving it at a chemical level.
- Best for: Deep, set-in stains
- Strength: High
- Surfaces: Porcelain, tile, some fiberglass (check label)
Lactic or Organic Acid-Based Cleaners
These are milder and often marketed as safer alternatives. They still break down rust but require slightly longer dwell times.
- Best for: Moderate stains
- Strength: Medium
- Surfaces: Most bathroom materials
Multi-Purpose Calcium, Lime, and Rust Removers
These products target multiple mineral deposits at once. They are useful in areas with hard water buildup.
- Best for: Mixed mineral stains
- Strength: Medium to high
- Surfaces: Varies by formula
Pros and Cons of Commercial Rust Removers
|
Pros |
Cons |
|
Fast and reliable results |
Contains strong chemicals |
|
Effective on deep stains |
Requires careful handling |
|
Reduces need for scrubbing |
Not suitable for all surfaces |
|
Works on large areas |
Higher cost than DIY methods |
Practical Tips for Better Results
- Apply cleaners evenly to avoid patchy results
- Work in sections when treating large areas
- Use minimal scrubbing and let the product do the work
- Rinse and inspect before repeating application
Commercial products are most effective when used correctly and paired with proper technique.
When combined with regular maintenance, they can significantly reduce both cleaning time and long-term buildup.
Surface-Specific Rust Removal Guide
Rust removal is not one-size-fits-all. Each shower material reacts differently to acids, abrasives, and dwell time. Using the wrong method can cause permanent damage, even if the rust is removed. A surface-specific approach ensures effective cleaning while preserving the integrity of the material.
Before applying any cleaner, always identify the surface type and test a small hidden area. This reduces the risk of etching, discoloration, or surface weakening.

A. Porcelain
Porcelain is dense, non-porous, and highly durable. It can tolerate a wider range of cleaning methods compared to other materials.
Mild acids such as vinegar or lemon juice are safe for light stains. For moderate to heavy buildup, baking soda paste or oxalic acid-based cleaners can be used effectively.
Best practices:
- Use non-abrasive sponges or soft brushes
- Allow proper dwell time for chemical action
- Rinse thoroughly to prevent residue buildup
Even small scratches can compromise the protective surface and make future staining more likely.
B. Fiberglass
Fiberglass is more sensitive than porcelain and requires careful handling. Its surface can dull or scratch easily, especially with abrasive cleaners.
Use mild, non-abrasive solutions such as diluted vinegar or baking soda paste. Limit dwell time to prevent surface damage.
Best practices:
- Apply cleaners gently with a soft cloth or sponge
- Keep dwell time between 10 to 15 minutes
- Rinse immediately after cleaning
Fiberglass does not tolerate repeated harsh treatment. Over time, improper cleaning can lead to permanent discoloration.
C. Natural Stone (Marble, Travertine)
Natural stone is highly porous and chemically sensitive. Acidic cleaners, including vinegar and lemon, can cause etching that permanently damages the surface.
Only pH-neutral cleaners specifically designed for stone should be used.
Best practices:
- Use stone-safe cleaners with neutral pH
- Apply with a soft cloth and minimal pressure
- Dry the surface completely after cleaning
Once etched, stone cannot be restored through standard cleaning. Professional refinishing is often required.
D. Grout
Grout is porous and absorbs rust more easily than surrounding surfaces. This makes stains more persistent and harder to remove.
Paste-based methods work best because they stay in place and allow longer contact time.
Best practices:
- Apply baking soda or hydrogen peroxide paste directly into grout lines
- Allow 20 to 30 minutes of dwell time
- Use a soft-bristle brush for controlled cleaning
Sealing grout after cleaning can help reduce future staining and make maintenance easier.
Step-by-Step Master Process for Removing Rust Stains in Shower
A consistent, methodical approach is the most reliable way to remove rust stains without damaging your shower surface. Each step serves a specific purpose, from identifying the stain correctly to preventing it from returning.
Below is a detailed workflow that applies to most shower materials, with adjustments based on severity and surface type.
1. Identify the Stain Type and Severity
Start by examining the stain closely under good lighting. The color, spread, and location provide important clues about how deep the rust has penetrated.
- Light stains: Faint orange or yellow marks, usually on smooth surfaces
- Moderate stains: Darker orange or brown patches, slightly embedded
- Deep stains: Dark brown or blackened areas, often in grout or textured surfaces
Also consider the pattern. Wide, uneven stains are often water-related, while circular or concentrated marks usually come from metal objects.
Correct identification ensures you choose a cleaner that is strong enough without being excessive.
2. Pre-Rinse the Area
Rinse the stained area with warm water using a handheld showerhead or a cup before applying any cleaner. This removes loose debris, soap residue, and surface minerals that can interfere with cleaning.
Pre-rinsing also slightly warms the surface, which can improve how well cleaning agents spread and react.
3. Choose the Correct Cleaner
Select your cleaning solution based on the stain severity and surface material.
- Light stains: Vinegar or lemon-based solutions
- Moderate stains: Baking soda paste or hydrogen peroxide mixtures
- Deep stains: Oxalic acid or commercial rust removers
Always match the cleaner to the surface. For example, avoid acidic solutions on natural stone and limit strong chemicals on fiberglass.
4. Apply the Cleaner Evenly
Apply the cleaner directly onto the stained area, making sure it fully covers the affected surface. Uneven application can lead to patchy results.
Avoid over-applying. Excess product does not improve results and may make rinsing more difficult.
5. Allow Proper Dwell Time
Dwell time is critical. This is when the cleaner breaks down the rust chemically, reducing the need for scrubbing.
- Light cleaners: 10 to 15 minutes
- Paste mixtures: 20 to 30 minutes
- Strong chemical cleaners: 2 to 5 minutes, or as directed
Do not rush this step. At the same time, avoid letting products dry completely unless instructed, as this can reduce effectiveness or damage surfaces.
6. Gentle Agitation
After the dwell time, use light scrubbing to lift the loosened rust. The goal is to assist the cleaner, not replace it with force.
Use:
- Soft sponges for smooth surfaces
- Microfiber cloths for delicate finishes
- Soft-bristle brushes for grout lines
Apply consistent, gentle pressure. Aggressive scrubbing can scratch surfaces and make future staining worse.
7. Rinse Thoroughly
Rinse the area completely with clean water to remove all cleaning residue. Leftover product can continue reacting with the surface or leave behind streaks.
Pay close attention to corners, grout lines, and edges where residue tends to collect.
A thorough rinse also allows you to clearly assess whether the stain has been fully removed.
8. Dry the Surface
Drying is often overlooked but plays a key role in preventing new rust stains. Water left on surfaces can redeposit minerals and restart the staining process.
Use a clean towel or microfiber cloth to dry the area completely. Focus on flat surfaces and corners where water tends to sit.
This step is especially important in areas with hard or iron-rich water.
9. Repeat if Necessary
Some stains, especially moderate to deep ones, may not disappear after a single treatment. If the stain has lightened but is still visible, repeat the process using the same or slightly stronger method.
Avoid escalating to harsh chemicals too quickly. Gradual removal is safer for most surfaces.
If multiple attempts show little improvement, reassess the stain source or consider a stronger commercial cleaner.
Preventing Rust Stains in Shower Long-Term
Once rust stains are removed, prevention becomes the most important step. Simple daily habits and small adjustments go a long way in keeping showers and bathtubs rust-free.
A. Remove Metal Items from Wet Surfaces
Many rust stains start with everyday bathroom items. Shaving cream cans, razors, shower caddies, and metal soap dishes can rust quickly when left in standing water.
Some habits you can start are:
- Store metal items outside the shower when not in use
- Choose plastic or stainless steel accessories
- Avoid leaving cans or bottles directly on tub edges
These small changes help prevent rust from transferring onto shower surfaces.
B. Improve Ventilation and Drying
Moisture that lingers on shower walls and tubs creates the ideal environment for rust to form. Bathrooms that don’t dry properly are more likely to develop recurring stains.
Make sure to run the exhaust fan during and after showers, open windows when possible, and wipe down shower walls and tub surfaces with a towel or squeegee.
Drying surfaces regularly reduces oxidation and slows rust development.
C. Address Hard Water and Iron in the Water Supply
If rust stains appear frequently despite regular cleaning, the issue may be iron in your water. Hard water leaves behind mineral deposits that oxidize over time.
To address this issue, you can do the following:
- Install a water softener or iron filter
- Use a showerhead filter designed for hard water
- Schedule periodic plumbing inspections for older homes
D. Maintain a Simple Cleaning Routine
Routine cleaning prevents iron deposits from building up and turning into stubborn rust stains. Following some cleaning tips won’t take a lot of time, but will help keep rust off your bathroom.
A simple routine might include:
- Weekly wipe-downs with mild cleaners
- Monthly vinegar rinses for problem areas
- Prompt cleanup of standing water or spills
Consistency keeps rust stains from becoming a recurring problem.
When Rust Stains Indicate a Bigger Problem
Rust stains are often treated as a surface-level cleaning issue, but in many cases, they point to underlying problems that will continue unless properly addressed. If stains return quickly, spread across multiple areas, or worsen over time, it is important to shift from cleaning to diagnosis.
Understanding the root cause allows you to prevent recurring damage, reduce long-term costs, and protect both your plumbing system and bathroom surfaces.
Signs of Pipe Corrosion
One of the most common hidden causes of persistent rust stains is internal pipe corrosion. This is especially common in older homes with galvanized steel plumbing, where pipes gradually break down and release iron particles into the water supply.
Look for the following indicators:
- Water appears yellow, orange, or brown, especially when first turned on
- Rust stains appear across multiple fixtures, including sinks and toilets
- Staining becomes more frequent or intense over a short period
- Water has a metallic taste or odor
These signs suggest that rust is entering your water before it reaches the shower. In this case, surface cleaning alone will not solve the problem.
When Plumbing Inspection Is Necessary
If rust stains persist despite consistent cleaning and normal water test results, a plumbing inspection becomes important.
You should consider a professional inspection when:
- Stains reappear within days after cleaning
- Only hot water produces discoloration, suggesting heater-related corrosion
- Water pressure has decreased along with increased staining
- Your home has older or unknown pipe materials
A licensed plumber can inspect pipes internally, check for corrosion buildup, and recommend repair or replacement if needed.
When to Consider Professional Cleaning or Restoration
If stains are extensive, deeply embedded, or tied to ongoing water issues, professional services may be the most efficient option.
Professionals use specialized equipment and industrial-grade cleaners that are not typically available for household use. More importantly, they can assess whether the issue is cosmetic or systemic.
Consider professional help when:
- Multiple cleaning methods have failed
- Stains cover large or hard-to-reach areas
- There is visible damage to the surface material
- You want to restore the shower without risking further damage
Conclusion: Removing Rust Stains in Shower and Bathtub
Rust stains can vary from light surface marks to deeply embedded discoloration, but most can be removed with the right approach. The key is matching the cleaning method to the severity of the stain, starting with gentle solutions for minor buildup and progressing to stronger treatments only when necessary.
Early treatment makes a significant difference. Fresh stains are easier to lift and require less effort. Waiting too long allows rust to settle deeper into surfaces, which increases both cleaning time and the risk of damage.
It’s also important to recognize that rust stains are often a symptom of underlying conditions such as iron in water, constant moisture, or corroding metal. Addressing these factors through regular maintenance and simple preventive steps helps reduce repeat staining.
With a structured process, proper product selection, and consistent upkeep, most shower rust stains can be managed effectively. What may seem like a persistent problem is often a controllable one with the right method and timing.
FAQ
FAQs on How to Get Rid of Rust Stains in Shower
The time required depends on the severity of the stain and the method used.
Light surface stains can often be removed within 10 to 20 minutes using vinegar or lemon-based solutions. Moderate stains may take 30 minutes or more due to longer dwell times and gentle scrubbing. Deep or set-in stains often require multiple treatments over several days, especially if using stronger cleaners.
Rushing the process usually leads to incomplete removal, so allowing proper dwell time is essential for effective results.
Yes, rust stains can return if the underlying cause is not addressed.
Common sources include iron in water, constant moisture, or metal objects left in wet areas. Even after successful cleaning, these conditions can lead to new stains forming over time.
Preventive measures such as drying surfaces, removing metal items, and using water treatment systems can significantly reduce recurrence.
Hydrogen peroxide is generally more effective for moderate stains because it has stronger oxidizing properties. It works well when combined with baking soda to create a paste that lifts deeper rust buildup.
Vinegar, on the other hand, is milder and better suited for light surface stains or routine cleaning. The choice depends on the stain severity and the surface material. For most situations, starting with vinegar and moving to hydrogen peroxide if needed is a safe approach.
WD-40 is designed to loosen rust on metal surfaces, but it is not ideal for removing rust stains in showers. It can leave behind an oily residue that is difficult to clean and may make surfaces slippery.
For shower cleaning, it is better to use products specifically formulated for rust removal, as they are more effective and safer for bathroom surfaces.
Yes, rust stains can cause long-term discoloration on fiberglass if left untreated. While the material itself may not corrode, the stain can penetrate the surface layer and become difficult to remove over time.
Using harsh abrasives or strong chemicals can also damage fiberglass by dulling or scratching the finish. This is why it is important to use gentle cleaning methods and address stains early before they become deeply embedded.
The fastest method for heavy rust stains is typically a commercial cleaner that contains oxalic acid or similar active ingredients. These products are designed to dissolve rust quickly with minimal scrubbing. Most require only a few minutes of dwell time before rinsing.
However, speed should not come at the expense of safety. Always follow instructions carefully, test on a small area first, and ensure proper ventilation during use to avoid damage or health risks.
A simple weekly cleaning routine is usually enough to prevent rust buildup in most showers. This can include wiping down surfaces, rinsing away residue, and occasionally using a mild cleaner like vinegar.
In areas with high iron content in water, more frequent maintenance may be necessary. Consistency is more important than intensity. Regular light cleaning prevents stains from forming and reduces the need for deep cleaning later.
They can. Sudden or widespread rust staining may signal corroded pipes or high iron levels in your water supply.