How to Clean a Stove Properly: 6 Easy Steps for Safe and Effective Results

What Most Homeowners Get Wrong About How to Clean Stove the Right Way
Most people assume cleaning a stove is as simple as wiping it down with soap and water. However, that quick routine rarely removes the grease, carbon buildup, and food residue that accumulate over time. Unfortunately, grease has a habit of staying exactly where you don’t want it.
These hidden layers can reduce how efficiently your stove heats over time, create unpleasant odors, and even pose safety risks.
One of the biggest mistakes people make when figuring out how to clean stove surfaces is focusing only on what they can see. The stove top might look clean, but grease and burnt food particles often collect all over it. Over time, these residues harden and become far more difficult to remove.
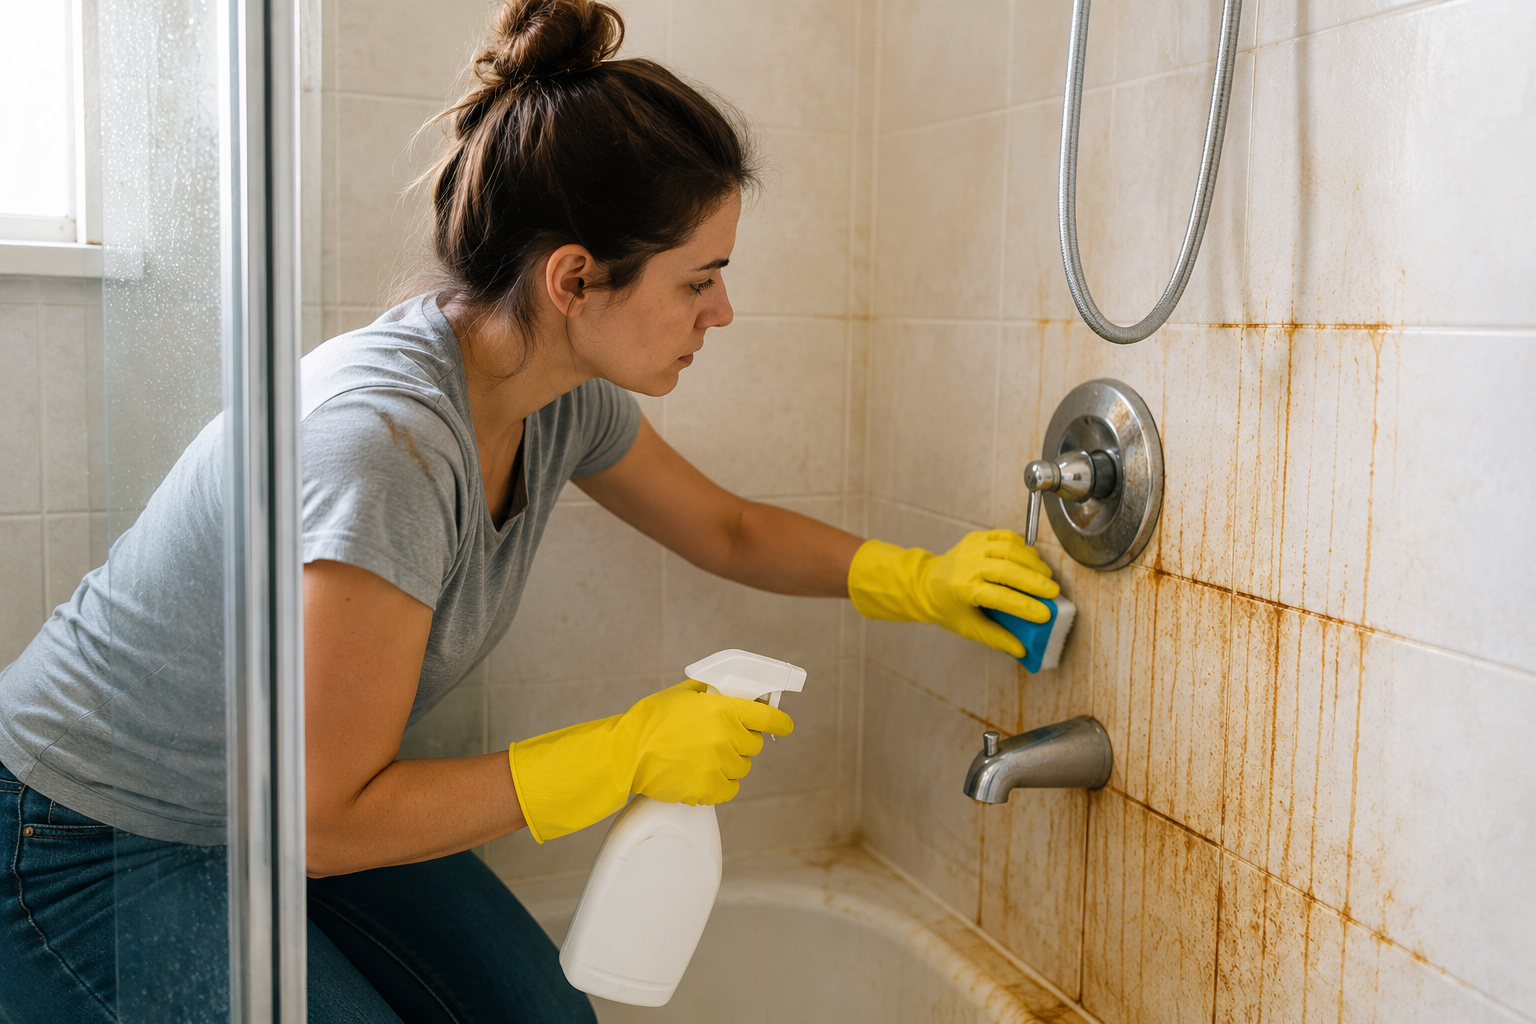
Another common issue is using the wrong cleaning tools. Steel wool, abrasive powders, and harsh chemical combinations can scratch delicate surfaces like glass or ceramic stove tops. Once scratches appear, grease sticks more easily, making the stove even harder to maintain.
Many homeowners also confuse quick cleaning with deep cleaning, even though both serve different purposes. Knowing when to do each can save time and prevent long-term buildup.
A quick wipe-down removes loose crumbs and minor spills, but it doesn’t tackle stubborn grease buildup. Deep cleaning, on the other hand, involves removing burners, soaking grates, and carefully cleaning hidden components.
Let’s go step by step so you can clean your stove safely and effectively.
Table of Contents
- Why Knowing How to Clean a Stove Correctly Matters
- Before You Start – Tools, Supplies, and Safety Checklist
- How to Clean a Stove Step by Step
- How to Clean Stove Tops (Gas, Electric, Glass & Induction)
- How to Clean Stove Burners, Grates, and Drip Pans Thoroughly
- How to Remove Burnt-On Grease and Tough Stains
- How to Clean Stove Knobs, Control Panels, and Hard-to-Reach Edges
- How to Clean a Range Hood and Stove Hood Properly
- Daily, Weekly, and Monthly Stove Cleaning Routine
- Common Mistakes People Make When Learning How to Clean a Stove
- Natural vs Commercial Stove Cleaners – Which Is Better?
- When to Consider Professional Stove Cleaning
Why Knowing How to Clean a Stove Correctly Matters
A clean stove is more than just a visual improvement in your kitchen. Proper maintenance affects safety, cooking performance, and even the lifespan of the appliance itself.
For example, a clogged gas burner may produce uneven flames, leading to longer cooking times and inconsistent results when preparing meals.
How Grease Buildup Affects Heat Distribution and Performance
Grease and food residue act as insulation between the burner and the cookware. This buildup prevents heat from spreading evenly, which means your stove must work harder to reach the desired temperature. Over time, inefficient heat transfer can increase energy usage and cooking time.
When learning how to clean a stovetop, it’s essential to understand that even small amounts of debris can disrupt burner performance. Gas burners may produce uneven flames, while electric stoves might heat inconsistently.
Fire Hazards Linked to Dirty Burners and Hoods
One of the most serious risks of a dirty stove is fire. Grease buildup on burners and surrounding surfaces can ignite when exposed to high heat. Additionally, neglected range hood filters accumulate flammable grease particles.
The hood removes grease-laden air during cooking, but its filters require regular cleaning to prevent buildup.
Hygiene, Odor Control, and Pest Prevention
Food particles trapped beneath grates or inside drip pans can attract pests such as ants and cockroaches. These residues also cause unpleasant smells when reheated during cooking.
Knowing how to clean your stove top thoroughly helps eliminate these hidden food sources, improving overall kitchen hygiene.
Extending the Lifespan of Your Stove
Stoves are significant household investments. Regular maintenance prevents corrosion, clogged burners, and electrical issues. By practicing proper cleaning routines, you can extend the life of your appliance for many years.
Before starting the cleaning process, it’s important to prepare the right tools and follow basic safety precautions.
Before You Start – Tools, Supplies, and Safety Checklist
Before tackling a deep cleaning session, gather the proper supplies. Using the right tools ensures that you clean effectively without damaging delicate stove components.
Essential Cleaning Supplies for Every Stove Type
The supplies you use can make a major difference in how effectively you remove grease, food residue, and stubborn stains.
Below are the essential supplies most experts recommend when figuring out what to clean a stove with.
Dish Soap
Dish soap is one of the safest and most versatile cleaners for stove maintenance. Its grease-cutting formula breaks down cooking oils, food spills, and everyday grime without damaging surfaces.
Baking Soda
Baking soda is a powerful but gentle cleaning agent that works especially well on burnt food and stubborn stains.
When mixed with water to create a paste, it forms a mild abrasive that lifts residue without scratching the stovetop.
Many homeowners rely on baking soda, particularly for removing burnt-on grease or carbon buildup around burners and grates.
White Vinegar
White vinegar is excellent for cutting through grease and neutralizing odors. Its mild acidity helps dissolve sticky residue and disinfect surfaces at the same time. When combined with baking soda, vinegar creates a fizzing reaction that loosens stubborn grime.
Vinegar is particularly useful for finishing touches when cleaning glass or stainless steel surfaces because it helps remove streaks and leaves the stove looking polished.
Degreasing Cleaners
For extremely greasy stoves, commercial degreasing cleaners can be helpful. These products are designed to break down thick layers of grease that accumulate after months of cooking. While natural cleaners work well for regular maintenance, heavy buildup sometimes requires stronger solutions.
Microfiber Cloths
Microfiber cloths are essential for wiping down stove surfaces without leaving scratches or streaks. Their tightly woven fibers trap grease and dirt more effectively than regular towels. They are particularly helpful when cleaning glass or ceramic stovetops, where maintaining a smooth finish is important.
Non-Scratch Scrub Pads
Non-scratch scrub pads provide enough friction to remove stubborn residue while protecting delicate surfaces. These pads are especially useful for cleaning drip pans, burner caps, and heavily used cooking areas.
Unlike steel wool or abrasive scrubbers, non-scratch pads help maintain the stove’s protective coating and prevent permanent marks on the surface.
Having these essential tools ready before starting your cleaning routine makes the entire process smoother.
|
Cleaning Supply |
Purpose |
|
Dish soap |
Removes grease and food residue |
|
Baking soda |
Gentle abrasive for burnt stains |
|
White vinegar |
Breaks down grease and disinfects |
|
Degreasing cleaners |
Handles heavy grease buildup |
|
Microfiber cloths |
Prevent scratching surfaces |
|
Non-scratch scrub pads |
Removes residue safely |
What NOT to Use When Cleaning a Stove
Some tools and chemicals can damage stove surfaces. Avoid the following:
- Steel wool or metal scrubbers
- Abrasive powder cleaners
- Mixing bleach and ammonia
- Excess water near gas ignition ports
These materials can scratch glass tops, corrode burners, or cause dangerous chemical reactions.
Safety Precautions Before You Begin
Safety should always be your first priority when learning how to clean your stove.
While stove cleaning may seem like a simple household task, the appliance involves heat, gas connections, and electrical components that can become hazardous if handled carelessly. Taking a few precautionary steps before you start cleaning helps prevent any accidents.
A. Allow the Stove to Cool Completely
Before you begin cleaning, make sure the stove has cooled down fully. Cleaning a hot surface can cause serious burns, and some cleaning products may release strong fumes when applied to heated metal or glass.
A cool stovetop also makes it easier to remove grease and food residue because cleaning solutions have time to sit and break down stains properly. Waiting 20–30 minutes after cooking usually allows the surface to reach a safe temperature.
B. Disconnect Power for Electric Models
If you are cleaning an electric stove or induction cooktop, disconnect the appliance from its power source whenever possible. This helps prevent accidental activation while you are wiping the surface or removing components like drip pans or coils.
C. Turn Off the Gas Supply if Necessary
For gas stoves, ensure the burners are completely turned off before you start cleaning. If you plan to remove burner caps or clean around the gas ports, it may be helpful to shut off the gas supply temporarily for extra safety.
This helps prevent accidental gas leaks and ensures that the burners will relight properly after cleaning.
D. Protect Ignition Components from Water
Modern gas stoves often include electronic ignition systems that light the burners automatically. These components are sensitive to moisture, so it’s important to avoid pouring water directly onto the stovetop.
Instead, apply cleaning solutions with a cloth or sponge. Keeping ignition ports dry ensures the stove will ignite properly once cleaning is complete.
Taking a few minutes to prepare ensures that your cleaning process remains safe and effective.
How to Clean Stove Tops (Gas, Electric, Glass & Induction)
Different stove types require slightly different cleaning methods. Knowing these differences helps prevent accidental damage.
Most stovetops follow a similar basic cleaning process. Once you understand the general method, you can adapt it depending on your specific stove type.
General Step-by-Step Stove Top Cleaning Process
No matter the stove type, the basic cleaning process follows a simple sequence that removes grease, food debris, and stains safely. This routine works well for regular maintenance and forms the foundation for how to clean a dirty stove top effectively.
This general method works for gas, electric, glass, and induction stoves. The difference is not the steps themselves, but which parts you focus on and how careful you need to be with the surface.
Following these steps in order ensures the cleaner has time to break down grease while protecting the surface of the stovetop.

1. Remove Loose Debris
Start by wiping away crumbs, burnt food, and loose residue from the stovetop.
Clearing debris first prevents it from spreading while you clean and makes it easier to focus on grease and stains, as stated by the International Products Corporation.
2. Apply a Cleaning Solution
Apply a suitable cleaner to the surface. Warm water and dish soap work well for everyday cleaning, while baking soda paste can help loosen tougher grease and burnt food.
3. Let the Cleaner Sit
Allow the cleaner to sit for about 5–10 minutes. This gives the solution time to break down grease and soften stubborn residue before scrubbing.
4. Gently Scrub the Surface
Use a non-scratch scrub pad or microfiber cloth to gently scrub the stovetop. Focus on areas with visible grease or burnt stains while avoiding excessive pressure.
5. Wipe the Surface Clean
Use a damp cloth to remove the cleaning solution and loosened grime. Rinse the cloth as needed so you’re not spreading residue across the surface.
6. Dry the Stovetop
Finish by drying the surface with a clean microfiber cloth. This prevents streaks and water spots while leaving the stovetop looking polished.
What’s Different for Each Stove Type
A. Gas Stoves
Unlike glass or induction stoves, gas stoves have multiple removable parts, such as grates and burner caps, where grease and food debris collect. This means cleaning a gas stove involves more disassembly and soaking.
For a more detailed breakdown of each step, you can refer to this guide on how to clean a gas stove top.
Compared to electric or glass stoves, gas burners require more detailed cleaning around burner ports to prevent clogs and uneven flames. The surface itself is usually durable, but the components require more maintenance.
Main focus areas:
- Grates
- Burner caps
- Burner ports
- Area beneath burners
B. Electric Coil Stoves
Unlike gas stoves, electric coil burners must be removed carefully and should never be soaked in water. The main cleaning task for electric stoves involves drip pans, which collect grease and burnt food.
Compared to glass stoves, electric coil stoves have more hidden areas where food can fall, which means drip pans often require soaking and scrubbing.
Main focus areas:
- Drip pans
- Area under coils
- Surface around electrical sockets
C. Glass or Ceramic Stoves
Compared to gas and electric coil stoves, glass stove tops scratch much more easily, so abrasive tools must be avoided. However, glass stoves are easier to clean in terms of structure because they have a flat surface with no removable burners.
If you’re considering using specialty tools, it’s helpful to understand whether a Magic Eraser on a glass stove top is safe before applying it.
The main challenge with glass stoves is burnt-on stains and grease marks, which require gentle scraping and non-abrasive cleaners.
Main focus areas:
- Burnt-on stains
- Grease film
- Streaks and polish finish
D. Induction Stoves
Induction stoves are similar to glass stovetops but typically collect less burnt residue because the surface does not get as hot as traditional electric or gas burners.
Unlike gas stoves, induction stoves do not have burner components to remove, so cleaning is mostly surface maintenance and grease removal.
Main focus areas:
- Surface grease
- Fingerprints
- Light residue
Understanding these differences helps you clean more efficiently without damaging your stove. Most cleaning problems happen not because people don’t clean, but because they use the wrong method for their stove type.
Summary: The Main Difference Between Stove Types
|
Stove Type |
Main Cleaning Task |
Biggest Risk |
|
Gas |
Cleaning grates and burner ports |
Clogged burners |
|
Electric Coil |
Cleaning drip pans |
Electrical damage from water |
|
Glass/Ceramic |
Removing burnt stains |
Scratching the surface |
|
Induction |
Wiping surface |
Surface streaking |
How to Clean Stove Burners, Grates, and Drip Pans Thoroughly
While wiping the stovetop keeps the kitchen looking clean, the real buildup often hides in the burners, grates, and drip pans. These components sit directly above the heat source, so they collect residue over time.
If ignored, this buildup can block burner flames, cause uneven heating, and even create unpleasant odors during cooking.
Learning how to clean the stove burners and surrounding parts thoroughly helps restore the stove’s efficiency and prevents long-term damage. Deep cleaning these parts regularly ensures better flame performance, improved heat distribution, and a safer cooking environment.
The Best Soaking Method for Heavy Grease
Soaking is one of the easiest and most effective ways to loosen thick grease and hardened food residue from stove parts like grates, burner caps, and drip pans.
- Fill a sink with hot soapy water – Use hot water mixed with a few drops of dish soap to help break down grease and soften food residue.
- Place removable stove parts in the water – Submerge grates, burner caps, and drip pans so the greasy areas are fully covered.
- Let the parts soak for 20–30 minutes – This allows the hot water and soap to loosen hardened grease and burnt food.
- Add baking soda for extra cleaning power – Sprinkle a few tablespoons of baking soda into the water if the residue accumulation is heavy.
- Scrub away remaining residue – After soaking, use a non-scratch scrub pad or brush to remove any leftover grease or food particles.
Removing Burnt-On Food and Carbon Buildup
Even after soaking, some stubborn stains may remain. Burnt food and carbon deposits often form on grates and burner caps because they are exposed to high heat.
To remove these stains:
- Create a baking soda paste using baking soda and water.
- Spread the paste over burnt areas.
- Let it sit for 10–15 minutes.
- Scrub gently using a non-scratch pad or brush.
This method works well because baking soda is abrasive enough to remove carbon buildup but gentle enough to avoid scratching metal surfaces.
Cleaning Gas Burner Ports Safely
Gas burners contain tiny holes called burner ports that release gas to create flames. If these ports become clogged with grease or debris, the burner may produce uneven flames or fail to ignite properly.
To clean them safely:
- Use a soft brush, toothpick, or wooden skewer.
- Gently remove any visible debris.
- Avoid metal tools that could damage the openings.
Keeping burner ports clean ensures the flame burns evenly and efficiently.
Proper Drying and Reassembly
After cleaning, rinse all removable parts thoroughly and allow them to dry completely. Moisture trapped inside burner components can interfere with ignition or cause uneven flames.
Once everything is dry:
- Reinstall burner caps and grates in their original positions.
- Ensure they sit securely and evenly.
- Test the burners briefly to confirm proper flame performance.
This step completes the deep-cleaning process and restores normal stove operation.
How to Remove Burnt-On Grease and Tough Stains
While regular cleaning removes surface residue, this section focuses on deeper stains that require more targeted methods.
Even with regular cleaning, stubborn stains can develop on a stove top. Spilled sauces, cooking oils, and sugary foods often harden when exposed to high heat. Over time, these residues create dark stains that don’t easily wipe away.
A. Baking Soda Paste Method
Baking soda is one of the most effective natural cleaning solutions for burnt stains. It works as a mild abrasive that lifts residue while remaining safe for most stove top materials.
To use this method:
- Mix baking soda and water to form a thick paste.
- Apply the paste directly to burnt or greasy areas.
- Allow it to sit for 15–30 minutes.
- Scrub gently with a soft sponge or cloth.
Time expectation: This method usually takes 20 to 40 minutes total. Moderate stains may require 2 applications.
This technique is widely recommended when cleaning a stove top with baking soda because it removes stains without harsh chemicals.
B. Vinegar Steam Treatment
Vinegar is excellent for dissolving grease and loosening sticky residue. It also helps neutralize cooking odors.
After applying baking soda paste:
- Spray white vinegar over the paste.
- The mixture will begin to fizz.
- Let the reaction sit for a few minutes.
Time expectation: Expect 30 to 45 minutes. Heavy buildup may require repeating the process 2–3 times.
Reputable chemistry sources state that the fizzing action helps lift stubborn grime from the stovetop, making it easier to wipe away.
When to Repeat the Cleaning Process
You should repeat the cleaning process if:
- The surface still feels sticky
- Dark stains remain after wiping
- Burn marks are still visible
- Grease odor remains when cooking
Some heavily burnt areas require 2–3 full cleaning cycles before the stain is completely removed. Allowing the cleaning solution to sit longer is often more effective than scrubbing harder.
Important Tip: Let Time Do the Work
One of the biggest mistakes people make when cleaning burnt grease is scrubbing too hard too soon. Most cleaning solutions need time to break down grease. Letting baking soda or degreaser sit longer reduces scrubbing effort and lowers the risk of damaging the stove surface.
How to Clean Stove Knobs, Control Panels, and Hard-to-Reach Edges
While the stovetop gets the most attention, smaller components such as knobs and control panels can accumulate grease quickly. Every time you adjust the heat while cooking, oils from your hands transfer to these surfaces.
Cleaning these areas regularly helps maintain both hygiene and proper stove function.
Safely Removing and Washing Knobs
Most stove knobs are removable and can be cleaned separately.
To clean them safely:
- Pull the knobs straight off the control panel.
- Soak them in warm water with dish soap.
- Use a soft brush to remove grease from crevices.
After cleaning, rinse thoroughly and allow them to dry completely before reinstalling.
Cleaning Around Electronic Controls
Modern stoves often include digital displays or touch controls. These components should be cleaned carefully to prevent moisture damage.
Instead of spraying cleaner directly onto the panel:
- Spray the cleaner onto a cloth first.
- Gently wipe the surface to remove fingerprints and grease.
- Use a microfiber cloth for streak-free results.
Preventing Moisture Damage and Electrical Issues
Excess water can seep into electrical components and cause malfunctions.
To prevent this:
- Use only lightly damp cloths.
- Avoid pouring liquid directly onto the control panel.
- Dry the area thoroughly after cleaning.
These precautions help protect sensitive electronics while keeping your stove clean.
How to Clean a Range Hood and Stove Hood Properly
The range hood plays an important role in maintaining a clean kitchen environment. It removes smoke, steam, grease particles, and cooking odors from the air while you cook.
However, because it constantly pulls grease-filled air upward, the hood and its filters can accumulate large amounts of residue over time. Knowing how to clean a range hood ensures proper ventilation and prevents grease buildup.
When grease accumulates inside the hood, it reduces airflow and makes ventilation less effective. Over time, this can cause smoke and odors to linger in the kitchen, especially during high-heat cooking.
Removing and Cleaning the Hood Filter
Most range hoods contain removable metal filters designed to trap grease.
To clean them:
- Remove the filter from the hood.
- Soak it in hot water with dish soap and baking soda.
- Let it sit for about 20 minutes.
- Scrub gently with a soft brush.
This removes grease buildup and restores proper airflow.
Degreasing Interior Surfaces
The interior of the hood may also collect grease over time. Use a degreasing cleaner or warm soapy water to wipe the inside surfaces.
Regular cleaning prevents grease from dripping onto the stove while cooking.
Cleaning Stainless Steel and Glass Exteriors
The outer surface of the hood should also be cleaned regularly.
- Use a microfiber cloth and mild cleaner.
- Wipe in the direction of the metal grain for stainless steel.
- Use vinegar solution to remove streaks on glass.
This keeps the hood looking polished and professional.
How Often Should You Clean the Hood
The cleaning frequency depends on cooking habits.
For light cooking households, cleaning every 2-3 months is enough. However, for households that experience more frequent cooking, it’s best to clean the hood once a month.
Regular maintenance ensures the hood continues to remove smoke and grease efficiently.
Daily, Weekly, and Monthly Stove Cleaning Routine
Consistency is the key to maintaining a clean stove, although many people underestimate how long proper cleaning actually takes, as explained in this article on why we think cleaning is faster than it is.
Instead of waiting until grease becomes difficult to remove, following a simple routine helps keep your stove clean with minimal effort.
Stove cleaning generally falls into two categories: quick cleaning for daily maintenance and deep cleaning for removing buildup. Understanding both helps you maintain your stove more efficiently.
Quick Daily Wipe-Down Checklist
Daily maintenance prevents food and grease from hardening. This quick routine takes only a few minutes but prevents long-term buildup.
After cooking:
- Wipe spills immediately.
- Remove crumbs and loose debris.
- Clean the stovetop with a damp cloth.
Weekly Maintenance Plan
Once a week, perform a more detailed cleaning. Weekly maintenance keeps grease from accumulating in hidden areas.
Tasks include:
- Wiping the entire stovetop with a degreasing cleaner.
- Cleaning stove knobs and control panels.
- Washing removable grates or drip pans.
Monthly Deep Cleaning Schedule
This deeper cleaning helps maintain stove performance and safety. A monthly deep clean should include:
- Cleaning burners and burner ports.
- Soaking grates and drip pans.
- Cleaning the range hood filters.
Signs Your Stove Needs Immediate Attention
Certain warning signs indicate your stove needs cleaning right away. Addressing these issues early prevents more serious problems.
- Uneven burner flames
- Strong grease odors while cooking
- Smoke during normal cooking
- Sticky knobs or controls
|
Cleaning Frequency |
Tasks |
|
Daily |
Wipe spills and crumbs |
|
Weekly |
Clean stovetop and knobs |
|
Monthly |
Deep clean burners and grates |
|
Every 2–3 months |
Clean range hood filters |
Common Mistakes People Make When Learning How to Clean Stove
Even with good intentions, many homeowners accidentally damage their appliances when figuring out how to clean stove surfaces.
Understanding these common mistakes helps you avoid unnecessary damage and maintain your stove properly. A careful approach not only keeps the appliance looking clean but also ensures it continues to perform safely and efficiently over time.
A. Using Abrasive Scrubbers on Delicate Surfaces
One of the most common cleaning mistakes is using steel wool, rough scrubbers, or abrasive powders on stovetops. While these tools may remove grease quickly, they can leave permanent scratches on delicate surfaces such as glass, ceramic, or enamel finishes.
Once scratched, grease sticks more easily and becomes harder to clean.
B. Cleaning While the Stove Is Still Hot
Cleaning a hot stovetop can cause several problems.
First, it increases the risk of burns. Second, many cleaning products evaporate too quickly on hot surfaces, which prevents them from breaking down grease effectively. In some cases, applying cold water to a hot glass cooktop may even cause the surface to crack.
Allow the stove to cool completely before starting the cleaning process.
C. Ignoring Burner Ports and Filters
Many people clean only the visible surface and forget about burner ports and hood filters. Over time, these hidden areas accumulate grease that affects stove performance.
D. Mixing Cleaning Chemicals Improperly
Another dangerous mistake is combining different cleaning products without understanding how they react. Certain chemical combinations, such as bleach and ammonia, can produce toxic fumes that are harmful to breathe.
Even mixing multiple commercial cleaners can sometimes create unwanted reactions. To stay safe, always follow product instructions and avoid combining different cleaning chemicals.
Natural vs Commercial Stove Cleaners – Which Is Better?
When learning how to clean a stove, one common question homeowners face is whether to use natural cleaning solutions or commercial products. Both options can be effective, but the right choice often depends on the level of residue accumulation, the type of stovetop surface, and personal preferences regarding safety and environmental impact.

Pros and Cons of Baking Soda and Vinegar
Baking soda and vinegar are among the most commonly recommended natural cleaning agents for stovetops. Baking soda works as a mild abrasive, which means it can loosen burnt food and grease without scratching most stove surfaces. When mixed with water to form a paste, it becomes particularly effective for removing stubborn stains.
Vinegar, on the other hand, is slightly acidic and works well for dissolving grease, cutting through sticky residue, and neutralizing odors. When vinegar is sprayed over baking soda paste, the two react and create a gentle fizzing action that helps lift grime from the surface.
The main advantages of these natural cleaners include:
- Safety – They do not produce harsh chemical fumes.
- Affordability – Most households already have them available.
- Surface protection – They are generally safe for gas, electric, and glass stovetops.
However, natural cleaners also have limitations. They may require more scrubbing and repeated applications when dealing with thick grease or long-neglected stovetops.
In situations where grease has hardened into heavy buildup, natural solutions might not be strong enough on their own.
When Commercial Degreasers Are Necessary
Commercial degreasers are designed to dissolve thick grease quickly.
They are especially useful in situations such as:
- Stovetops with thick grease accumulation
- Burners covered with carbon deposits
- Kitchens where cooking with oils and frying is frequent
- Appliances that haven’t been deep-cleaned for a long time
Commercial cleaners can significantly reduce scrubbing time, but they should be used responsibly and only when necessary.
Environmental and Safety Considerations
Another factor to consider when choosing between natural and commercial cleaners is their impact on health and the environment. Natural solutions like baking soda and vinegar are biodegradable and non-toxic, making them a safer option for households with children, pets, or individuals sensitive to chemical fumes.
Commercial cleaning products, while effective, often contain stronger chemicals that can release fumes if used in poorly ventilated spaces. Proper ventilation and protective measures can help reduce exposure while cleaning.
A balanced approach often works best. Natural cleaners are ideal for routine maintenance and light grease, while commercial degreasers can be reserved for occasional deep-cleaning tasks where stronger cleaning power is needed.
When to Consider Professional Stove Cleaning
While many homeowners can handle routine stove maintenance on their own, there are situations where professional cleaning becomes the safer and more effective option.
If you prefer to have your stove cleaned thoroughly, you can explore professional cleaning services in Denver for more specialized assistance.
A. Real-World Situations Where Professional Cleaning Is Recommended
Long-Term Grease Neglect
If a stove has not been deep cleaned for several months or years, grease can harden into thick layers that are extremely difficult to remove without professional-grade degreasers and tools.
Rental Move-Out or Move-In Cleaning
Rental properties often require thorough appliance cleaning before move-out inspections.
A stove may look clean on the surface but still contain grease buildup in burners, drip pans, and hood filters. Professional cleaning ensures the appliance meets inspection standards and is fully sanitized for the next occupant.
Post-Renovation or Construction Cleaning
After a kitchen renovation, dust and construction debris can settle inside burners, ventilation systems, and control panels. These materials can interfere with burner performance and airflow, making professional cleaning a safer option after major home projects.
B. Risks of Not Addressing Heavy Grease Buildup
Fire Hazards
Grease is highly flammable. When it accumulates around burners or inside range hood filters, it can ignite when exposed to high cooking temperatures. Professional cleaning removes hidden grease deposits that may not be visible during routine cleaning.
Permanent Surface Damage
Grease and burnt food can become carbonized over time, especially on stainless steel, enamel, and glass surfaces. If not removed properly, these stains can become permanent and may lead to surface discoloration or corrosion.
Reduced Appliance Lifespan
Blocked burner ports, clogged filters, and grease buildup around heating elements force the stove to work harder to produce heat. Over time, this extra strain can lead to component failure, ignition problems, or uneven heating.
C. When Cleaning Becomes Unsafe to Do Yourself
In some situations, attempting to clean the stove without professional help can be risky. This includes:
- Burners that will not ignite properly
- Strong gas odors near the stove
- Grease buildup inside the range hood motor or internal components
- Electrical issues with electric or induction stoves
- Extremely heavy carbon buildup that requires chemical degreasers
Professional cleaners are trained to handle these situations safely and use specialized tools designed for appliance cleaning.
D. Cost vs Long-Term Appliance Protection
Although professional stove cleaning involves an upfront cost, it can help prevent expensive repairs, improve appliance performance, and extend the lifespan of the stove.
For heavily used kitchens or long-neglected appliances, professional cleaning can be a practical long-term investment rather than an unnecessary expense.
Mastering How to Clean Stove for a Safer, Cleaner Kitchen
Understanding how to clean a stove properly is an essential part of maintaining a safe and efficient kitchen. Every step in cleaning your stove plays a role in keeping your appliance functioning properly.
Over time, consistent cleaning habits not only improve safety but also make future cleaning easier. Small, regular efforts can prevent the need for more intensive deep cleaning later on.
Regular maintenance prevents residue accumulation, improves heat distribution, and reduces fire risks. Simple habits, such as wiping spills immediately and performing monthly deep cleans, can extend the lifespan of your stove significantly.
With consistent care and the right cleaning techniques, your stove will continue to perform reliably while keeping your kitchen clean, safe, and ready for every meal you prepare.
FAQ
FAQs About How to Clean a Stove
The easiest way to clean a stove top is to clean it immediately after cooking once the surface has cooled.
Start by wiping away crumbs or loose food particles with a dry cloth. Next, use a mixture of warm water and dish soap with a soft sponge or microfiber cloth to remove grease and spills.
For tougher stains, sprinkle a small amount of baking soda on the area and gently scrub. Regular quick cleanings prevent grease and food from hardening, which makes deep cleaning much easier.
Oven cleaner can sometimes be used on certain stovetop surfaces, but it should be done with caution.
Many oven cleaners contain strong chemicals designed for heavy carbon buildup, which may damage delicate stove top materials. Before using an oven cleaner, always check the stove manufacturer’s recommendations. If it is safe for your appliance, apply the cleaner sparingly and avoid contact with burner ports, electrical components, or control panels.
In many cases, gentler options such as baking soda, vinegar, or a stovetop-specific cleaner are safer and just as effective for routine cleaning.
Baking soda is generally considered one of the safest and most versatile cleaners for most stovetop types, including gas, electric coil, glass, and induction stoves. Because it is only mildly abrasive, it can help remove burnt food and grease without scratching most surfaces when used correctly.
Mixing baking soda with water to create a paste allows it to cling to stubborn stains and loosen residue over time.
A thorough deep cleaning should typically be done once a month, although the exact frequency depends on how often you cook.
If you cook frequently, grease can accumulate quickly and may require more frequent cleaning. A monthly deep clean should include removing and washing burner grates, soaking drip pans, clearing burner ports, and wiping down the range hood filter.
In addition to monthly deep cleaning, it’s best to wipe the stovetop daily and perform a more detailed cleaning weekly. This routine prevents buildup and keeps the stove operating efficiently.
For best results, baking soda should sit on greasy or burnt areas for 15 to 30 minutes before scrubbing. During this time, the baking soda works to break down oils and loosen hardened food residue.
For extremely tough buildup, repeating the process or allowing the paste to sit longer can help improve results.
Black burnt stains usually form when food spills or grease are exposed to high heat repeatedly. To remove them, start by applying a thick paste made from baking soda and water directly onto the stain. Allow the paste to sit for at least 20–30 minutes so it can loosen the burnt residue. Then scrub gently using a non-scratch sponge or cloth.
For glass cooktops, a specialized cooktop scraper can help remove hardened residue safely. Avoid harsh scrubbers that could scratch the surface. Repeating the process may be necessary for stains that have built up over time.
Glass stovetops are durable but can be easily scratched if the wrong cleaning tools are used.
Avoid using steel wool, abrasive powders, rough scrub brushes, or harsh scouring pads because they can permanently damage the smooth surface. Sharp metal tools should also be avoided unless they are specifically designed cooktop scrapers.
In addition, avoid harsh chemical cleaners that are not labeled safe for glass cooktops. Instead, use microfiber cloths, soft sponges, and cleaners specifically formulated for glass stovetops to maintain a smooth and polished finish.
Vinegar is generally safe for most stovetop surfaces and is often used to cut grease and remove streaks. Its mild acidity helps dissolve residue and neutralize odors without leaving harmful chemical residue behind. However, vinegar should be used with caution on certain materials like natural stone or unfinished metal, where prolonged exposure could cause dulling or corrosion.