How to Clean Oven Racks Quickly: 7 Fast and Simple Cleaning Methods

Why Cleaning Oven Racks Doesn’t Have to Be a Chore
If you’ve ever stared at your oven racks and wondered if they’re plotting revenge for all those burned dinners, you’re not alone. Grease and mystery crumbs have a way of sticking around far longer than anyone would like. Cleaning them can feel like a task nobody wants to deal with twice. But it doesn’t have to be that way.
Knowing how to clean oven racks quickly does save time, but it also saves your sanity. With the right methods, you can skip the endless scrubbing and get your racks clean again without turning your kitchen into a soaked disaster zone.
The problem usually comes down to accumulated grease and grime that stubbornly refuses to budge, but a few clever tricks can handle even the most stubborn mess.
In this article, you’ll learn practical methods that can help cut down scrubbing time and make oven rack cleaning much more manageable. Use the sections below to jump to the method that best fits your oven racks.
Table of Contents
Quick Answer: How to Clean Oven Racks Quickly
If you need the fastest way to clean oven racks, follow this simple method:
- Place racks in a bathtub or large container lined with a towel (to prevent scratches)
- Fill with hot water and add dish soap + 1–2 dishwasher tablets
- Let soak for 2–4 hours (or overnight for heavy grease)
- Scrub lightly with a sponge or brush to remove loosened grime
- Rinse thoroughly and dry completely before reinstalling
Fastest option: Soaking does most of the work, so you spend less time scrubbing.
Tips To Follow Before You Start
Before cleaning your oven racks, a little preparation can save you time, prevent accidents, and make the process much smoother. Taking a few extra minutes to plan can mean the difference between a frustrating clean and an efficient, satisfying one.
Gather the Right Supplies
Having all your tools and materials ready before you start prevents interruptions mid-cleaning.
Depending on the task, here’s a list of commonly needed supplies:
- Gloves for hand protection: Protects your skin from harsh chemicals and hot water.
- Scrubbers, brushes, and sponges: Use soft sponges for delicate surfaces and brushes for stubborn buildup.
- Dishwasher tablets: Handy for tackling baked-on grease or using in DIY cleaning solutions.
- Baking soda and vinegar: Natural cleaners that are versatile for deodorizing, scrubbing, and unclogging drains.
- Ammonia (use with caution): Powerful for cutting grease and grime, but always handle it safely.
- Dryer sheets: Surprisingly useful for removing dust or pet hair from surfaces.
- Garbage bags: Keep the area clutter-free and make cleanup easier.
- Aluminum foil: Can be used to scrub stubborn stains on metal surfaces or prevent scratches.
Safety Precautions
Cleaning may seem routine, but it often involves exposure to chemicals and potentially hazardous reactions.
A few simple precautions help you clean safely and avoid damage
- Wear gloves to avoid irritation or burns
- Work in a well-ventilated area
- Never mix cleaning chemicals (e.g., ammonia + bleach)
- Protect nearby surfaces from spills
- Use hot water carefully to prevent burns
7 Easy Methods to Clean Oven Racks Quickly
Not all cleaning methods are equally fast. If your goal is to clean oven racks quickly, start with the fastest options below and only move to deeper methods if needed.
Comparison Table of Oven Rack Cleaning Methods

Fast Oven Rack Cleaning Methods (Under 1 Hour)
Method 1: Aluminum Foil Hack (Fastest Hands-On Option)
This method is best suited for spot-cleaning stubborn areas and quick touch-ups rather than full deep cleaning. The aluminum foil acts as a mild abrasive, helping lift baked-on residue without the need for heavy chemicals.
- Time: 10–20 minutes
- Effort: Moderate
- Best for: Spot cleaning and light buildup
- Why it’s fast: No waiting time. Results come from immediate scrubbing.
Step-by-Step Guide:
- Prepare the foil: Tear off a sheet of aluminum foil and crumple it into a loose ball large enough to grip comfortably.
- Apply a cleaning agent: Apply dish soap, baking soda, or a combination of both to the problem areas. This helps break down grease while the foil provides mechanical scrubbing action.
- Scrub gently: Use the foil to lightly scrub stubborn spots, focusing on areas with visible buildup. Work in small sections and use controlled pressure.
- Reapply as needed: For tougher residue, reapply cleaning solution and continue scrubbing until the grime begins to lift.
- Rinse thoroughly: Rinse the racks with warm water to remove loosened debris and any remaining cleaning residue.
- Dry completely: Wipe dry with a clean cloth or allow to air dry before placing back in the oven.
Method 2: Dishwasher Cleaning
This method is one of the most convenient options, requiring minimal hands-on effort. It works best for oven racks with light to moderate grease buildup and is ideal for routine maintenance rather than deep cleaning.
- Time: 1 hour (hands-off)
- Effort: Low
- Best for: Light to moderate grease
- Why it’s fast: Minimal effort. Cleaning happens automatically.
Step-by-Step Guide:
- Check compatibility: Before starting, confirm that your oven racks are dishwasher-safe.
- Pre-rinse if necessary: If there is visible loose debris or thick grease, give the racks a quick rinse or wipe-down. This prevents residue from spreading inside the dishwasher and improves cleaning performance.
- Position the racks properly: Place the racks inside the dishwasher in a way that does not block the spray arms. Avoid forcing them into the machine.
- Add a strong cleaning agent: Use a high-quality dishwasher tablet or heavy-duty detergent designed to cut grease. For better results, you can also place a tablet directly near heavily soiled areas (if safe for your dishwasher model).
- Select the appropriate cycle: Run a heavy-duty or pots-and-pans cycle with high heat. This helps break down grease more effectively than standard cycles. Avoid eco or quick cycles, as they may not provide enough cleaning power.
- Inspect after the cycle and dry thoroughly: Once the cycle is complete, check the racks for any remaining residue, especially in corners and joints. Remove the racks and dry them completely before placing them back in the oven.
Moderate Methods (1–4 Hours)
Method 3: Baking Soda and Vinegar
This method uses a mild chemical reaction to lift grease and grime without harsh chemicals. It’s ideal for moderate buildup and for those who prefer a more natural cleaning approach.
- Time: 1–2 hours
- Effort: Moderate
- Best for: Moderate grease and routine deep cleaning
- Why it works: The reaction helps loosen grease, reducing scrubbing time.
Step-by-Step Guide:
- Prepare the racks: Place the oven racks in a sink, bathtub, or on a protected surface such as a towel.
- Apply baking soda: Sprinkle a generous layer of baking soda over all surfaces of the racks, focusing on greasy areas.
- Spray with vinegar: Lightly spray vinegar over the baking soda until it begins to foam. This reaction helps lift dirt and residue.
- Let it sit: Allow the mixture to sit for 30 to 60 minutes so it can break down the buildup.
- Scrub and rinse: Use a sponge or brush to scrub away loosened grime, then rinse thoroughly with warm water.
Method 4: Hot Water and Dish Soap Soak
This is one of the most reliable and low-risk methods for cleaning oven racks, especially for routine maintenance. It’s ideal if your racks are moderately dirty and you want a simple, effective approach using everyday household items.
- Time: 2–4 hours
- Effort: Moderate
- Best for: General cleaning and moderate buildup
- Why it works: Soaking softens grease, making it easier to remove.
Step-by-Step Guide:
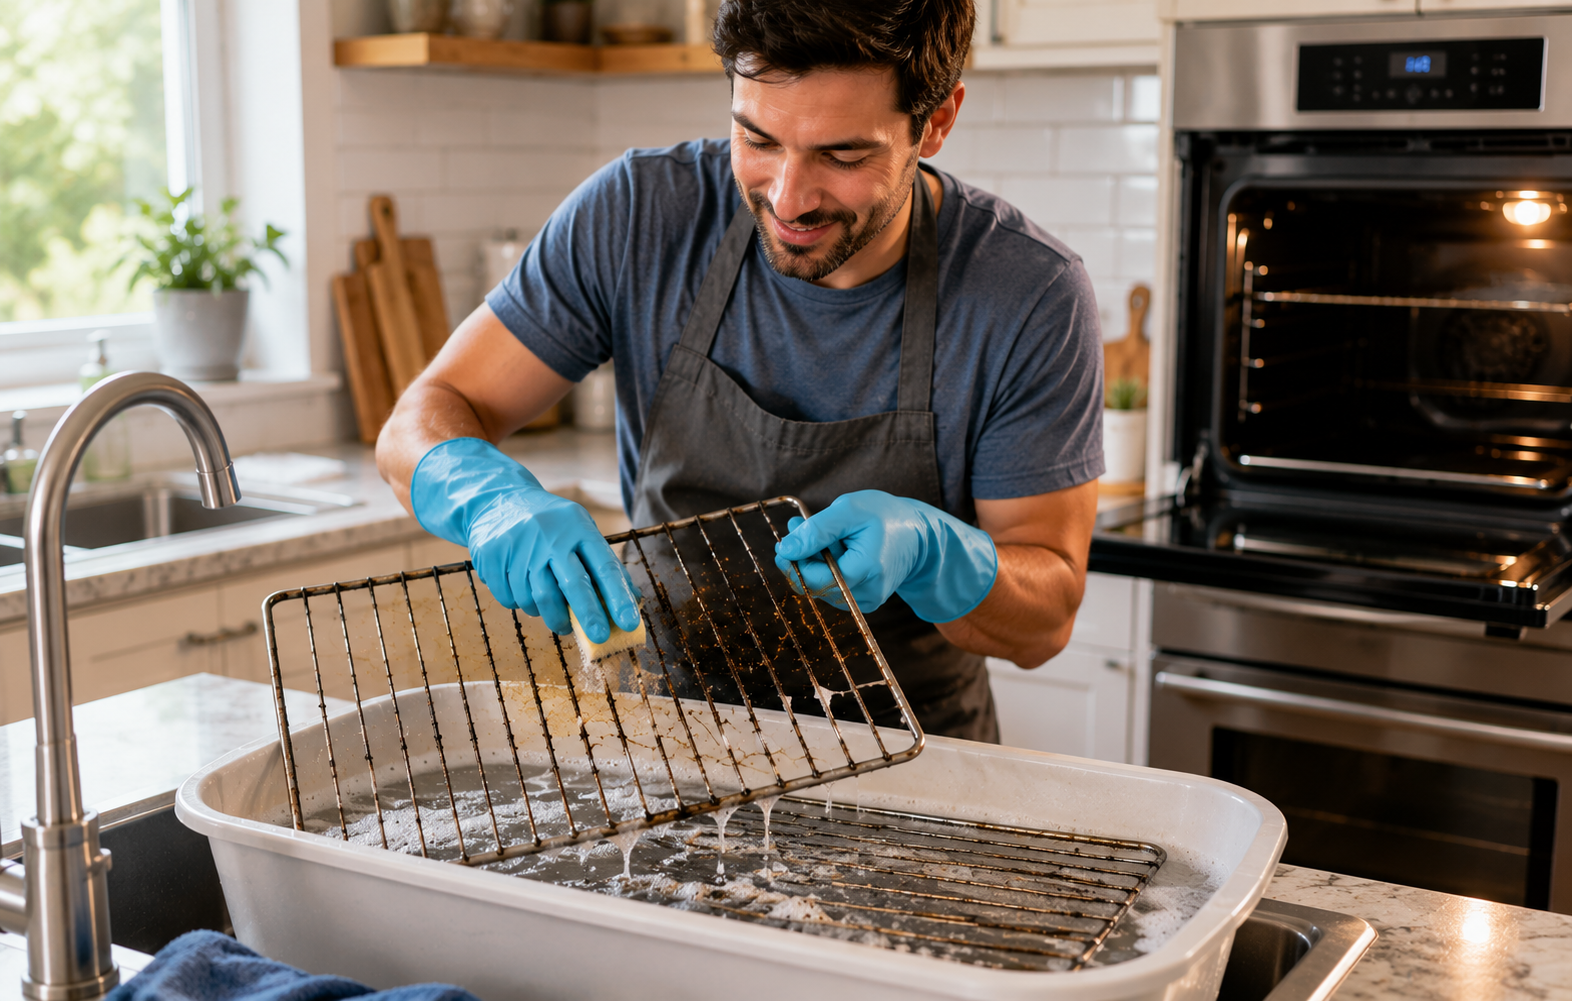
- Prepare your soaking area: Use a bathtub, utility sink, or any large basin that can fully fit the oven racks. To prevent scratches or residue buildup, line the surface with an old towel or cloth.
- Fill with hot water: Fill the tub or sink with very hot (but not boiling) water. Just enough to completely submerge the racks. Hot water helps break down grease more efficiently than cold water.
- Add dish soap: Mix in a generous amount of grease-cutting dish soap. Swirl the water to distribute it evenly and create a soapy solution.
- Submerge the oven racks: Place the racks fully into the water, ensuring all greasy areas are covered. Avoid stacking them directly on top of each other for better exposure.
- Let them soak: Allow the racks to soak for 2 to 4 hours. For heavier buildup, extending the soak time can significantly improve results.
- Scrub gently: After soaking, use a non-abrasive sponge, soft brush, or nylon scrubber to remove loosened grime.
- Rinse and dry thoroughly: Rinse the racks with clean water to remove any soap residue, then dry completely with a cloth or let them air dry before placing them back in the oven.
Deep Clean Methods (Overnight / Heavy Duty)
Method 5: Ammonia (Most Powerful for Heavy Grease)
This is highly effective for removing heavy, baked-on grease. Instead of scrubbing, it relies on ammonia fumes to loosen grime, making cleanup much easier. However, it requires careful handling.
- Time: 8–12 hours (overnight)
- Effort: Low
- Best for: Heavy, baked-on grease
- Why it works: Chemical breakdown removes grease with minimal effort.
Step-by-Step Guide:
- Prepare a sealed container: Place the oven racks inside a large, sealable bag or container.
- Add ammonia: Pour a small amount of ammonia into the container. Do not pour it directly onto the racks.
- Seal tightly: Close the bag or container to trap the fumes inside.
- Let it sit overnight: Leave the racks for 8 to 12 hours so the fumes can break down grease.
- Remove and scrub: Carefully open the container, then scrub off loosened grime and rinse thoroughly.
Method 6: Dryer Sheet Soak
This is a gentle, low-effort method that works well for light grease and maintenance cleaning. Dryer sheets help soften residue, making it easier to wipe away.
- Time: Several hours to overnight
- Effort: Low
- Best for: Light grease with minimal scrubbing
- Why it works: Softening agents break down grime over time.
Step-by-Step Guide:
- Prepare the soaking area: Use a bathtub or basin that can accommodate the oven racks. To prevent scratches or residue transfer, line the bottom with an old towel or cloth.
- Fill with warm water: Fill the tub with warm to hot water just enough to fully submerge the racks. Warmer water helps soften grease.
- Add dryer sheets: Place 2–4 dryer sheets into the water, depending on the size of the racks and level of buildup. Swirl the water slightly to help release the softening agents.
- Submerge the oven racks: Place the racks into the solution, ensuring all areas are covered. Avoid stacking them directly on top of each other for better contact with the solution.
- Let them soak: Allow the racks to soak for several hours. This gives the anti-static and softening agents in the dryer sheets time to break down grease.
- Scrub gently: After soaking, use a soft sponge or cloth to wipe away loosened grime. Focus on corners and between bars where buildup tends to collect.
- Rinse and dry thoroughly: Rinse the racks with clean water to remove any residue, then dry completely before placing them back in the oven.
Now that you’ve seen the main cleaning methods, the next step is choosing the one that fits your oven racks best.
How to Choose the Best Method for Your Oven Racks
With several options available, choosing the right method can save time and effort. The best choice depends on the condition of your oven racks and your cleaning preference.
Best Methods for Light vs Heavy Grease
The level of buildup on your oven racks should always guide your cleaning method.
Using a mild method on heavy grease will waste time, while using strong chemicals on light residue may be unnecessary.
For light grease or recent buildup:
- Dishwasher cleaning works well if the racks fit and are dishwasher-safe
- Dryer sheet soaking helps loosen surface grease with minimal effort
- Hot water and dish soap soaking is often enough for routine cleaning
These methods are effective because the grease has not fully hardened yet.
For moderate buildup:
- Baking soda and vinegar are a strong middle-ground solution
- Dish soap soaking combined with baking soda scrubbing improves results
At this stage, grease has started to harden, so you need a method that breaks it down rather than just loosening it.
For heavy or baked-on grease:
- Ammonia is one of the most effective options
- Garbage bag method with ammonia or baking soda traps fumes and speeds up breakdown
- Repeated soaking followed by scrubbing may be necessary
Heavy buildup usually forms after long periods without cleaning. In these cases, chemical reactions or extended soaking are required to break down hardened residue.
Natural vs Chemical Cleaning Options
Your choice between natural and chemical methods depends on safety preferences, cleaning strength, and ventilation conditions.
Natural cleaning options:
- Baking soda and vinegar
- Dish soap and hot water
- Aluminum foil with mild soap
These are safer for regular use and do not release strong fumes. They are effective for light to moderate grease but may require repeated applications for tougher buildup.
Chemical cleaning options:
- Ammonia
- Commercial oven cleaners
Chemical methods are more aggressive and break down grease faster. However, they require proper handling, ventilation, and protective gear.
They are best reserved for heavy buildup that natural methods cannot handle efficiently.
If you clean your oven racks regularly, natural methods are usually enough. Chemical methods are more suitable for deep cleaning after long periods of neglect.
Best Oven Rack Cleaning Method by Situation
What to Avoid When Cleaning Oven Racks
Cleaning oven racks the wrong way can do more harm than good. Some common mistakes can damage the metal, wear down protective coatings, or even make future cleaning more difficult.
Knowing what to avoid helps you protect your oven racks while still removing grease effectively.
A. Avoid Overly Abrasive Tools
It can be tempting to use steel wool or hard metal brushes for stubborn grime. While these tools may remove grease quickly, they can scratch the surface of your racks.
Scratches create tiny grooves where grease and food particles can build up more easily over time. Instead, use non-abrasive scrubbers or brushes that clean effectively without damaging the surface.
B. Do Not Mix Cleaning Chemicals
Mixing cleaning products may seem like a way to speed up results, but it can be dangerous. Certain combinations, such as ammonia and bleach, can produce harmful fumes.
Always use one cleaning solution at a time and rinse the racks thoroughly before switching to another method. This keeps the process safe and controlled. Health agencies also suggest using single cleaners instead of mixing.
C. Avoid Prolonged Exposure to Strong Chemicals
Leaving oven racks in strong chemicals longer than necessary can weaken their finish. Overexposure may lead to discoloration or damage to protective coatings.
Follow recommended soaking times and avoid extending them unless absolutely needed.
D. Be Cautious with Dishwashers
While convenient, dishwashers are not always suitable for every type of oven rack. High heat and strong detergents can cause warping or damage certain finishes.
Before placing racks in the dishwasher, check the manufacturer’s guidelines to make sure it is safe.
E. Do Not Skip Rinsing and Drying
After cleaning, any leftover residue can attract grease during future use. This can undo your cleaning efforts faster than expected.
Always rinse racks thoroughly with clean water and dry them completely before placing them back in the oven.
How to Keep Oven Racks Clean Longer
If your goal is to clean oven racks quickly, prevention is what makes that possible. The less buildup you allow, the less scrubbing, soaking, and time you’ll need later.
These simple habits keep grime minimal so your next cleaning is faster and easier.
A. Wipe Racks After Every Use
Wipe racks after cooking, especially if there were spills or splatters. Fresh grease removes much faster than hardened residue.
Once the oven cools slightly, use a damp cloth with mild dish soap. Even a quick 1–2 minute wipe can significantly reduce future cleaning time.
B. Schedule Regular Deep Cleaning
Even with daily maintenance, some buildup is unavoidable. Setting a regular cleaning schedule prevents grease from becoming too difficult to remove.
- Light oven use: clean every 2–3 months
- Moderate use: clean every 1–2 months
- Heavy or frequent cooking: clean monthly
Sticking to a schedule keeps grime at a manageable level and reduces the need for strong chemicals or long soaking times.
C. Use Oven Liners or Drip Trays
Spills from roasting, baking, or broiling often drip directly onto oven racks. As you continue to use your oven, these drips harden and become difficult to remove.
Using oven liners or placing a tray on a lower rack can catch grease before it reaches the surface. This is especially useful when cooking foods that release oils, such as meats or baked dishes with cheese.
Make sure liners are heat-safe and placed according to your oven’s guidelines to avoid blocking airflow.
D. Avoid Heavy Grease Buildup While Cooking
How you cook has a direct impact on how dirty your oven racks get. Reducing splatter during cooking can significantly limit residue buildup.
- Use lids or foil covers when appropriate
- Avoid overfilling baking trays
- Trim excess fat from meats before cooking
- Position racks properly to prevent drips from landing directly on them
These small adjustments reduce the amount of grease that reaches your racks, making future cleaning much easier.
E. Clean Spills Immediately When Safe
If you notice a spill during cooking, it is best to address it as soon as it is safe to do so. Letting spills sit through multiple cooking cycles causes them to harden and stick firmly to the metal.
Once the oven has cooled, remove the racks and clean the affected area. Quick action prevents stubborn buildup and keeps your racks in better condition.
F. Dry Racks Completely Before Reinstalling
After any cleaning, always make sure the racks are fully dry before placing them back into the oven. Moisture can lead to rust over time, especially if racks are frequently exposed to heat.
Use a clean towel or allow the racks to air dry completely. This simple step helps maintain their durability and appearance.
Even with these preventive steps, some buildup can still persist, especially on racks that have gone through repeated high-heat use without regular cleaning. When that happens, it’s time to shift from routine cleaning to more targeted solutions.
Troubleshooting Stubborn Oven Rack Grime
Even after choosing the right cleaning method, some oven racks may still hold onto grease. This usually happens when residue has been repeatedly baked on, forming a hardened layer that basic methods can’t fully remove.
At this stage, the issue isn’t choosing a method, but fixing what didn’t work. Adjusting your technique or layering methods can help remove the remaining buildup more effectively.
Toughest Spots and How to Tackle Them
Not all parts of the oven rack collect grime evenly. Certain areas are more prone to buildup due to how heat and grease circulate inside the oven.
Common problem areas include:
- Corners and joints where bars connect
- Edges closest to heating elements
- Areas directly under frequently used trays
These spots tend to trap grease, which hardens faster due to repeated heat exposure.
To clean these effectively:
- Apply a thick paste of baking soda and water directly onto the area
- Let it sit for at least 30–60 minutes to break down the residue
- Use a soft brush or non-abrasive scrubber to work into crevices
- For narrow gaps, use an old toothbrush or small detailing brush
If the buildup is extremely thick, repeat the process instead of scrubbing aggressively. Pressure alone will not remove hardened grease and may damage the rack surface.
Combining Methods for Best Results
Stubborn grime often requires more than one approach. Instead of relying on a single method, combining techniques can improve results significantly.
Effective method combinations include:
Soaking + Baking Soda Scrub
Start with hot water and dish soap soaking to loosen grease. Follow with a baking soda scrubbing to remove the remaining residue.
Ammonia + Light Scrubbing
Use ammonia overnight to break down hardened grease. The next day, minimal scrubbing is needed to finish the job.
Dryer Sheet Soak + Spot Treatment
Soak with dryer sheets for general cleaning, then apply baking soda paste on stubborn spots.
This layered approach works because each method targets grease differently. Soaking softens residue, while chemical reactions or abrasives break it down further.
When to Call Professional Cleaning
There are situations where home cleaning methods may not be enough or may not be worth the effort.
Consider professional cleaning if:
- Racks have extremely thick, layered grease buildup
- The rack coating is delicate or already damaged
- You want to avoid using strong chemicals at home
- Time is limited and deep cleaning is overdue
Professional services use specialized tools and solutions that can remove buildup more efficiently without damaging the material.
Conclusion: A Simpler Way to Keep Your Oven Racks Clean Without the Hassle
Cleaning oven racks often feels like one of those tasks that gets delayed until it becomes unavoidable. The good news is that it does not have to be complicated or time-consuming. Once you understand how to clean oven racks quickly, the process becomes much more manageable and far less frustrating.
Simple methods like soaking, baking soda, or dishwasher cleaning can handle most situations. For tougher grease, stronger solutions like ammonia may be necessary. Regular maintenance makes future cleaning easier and less time-consuming.
Consistency also plays a major role. Regular cleaning prevents grease from hardening and reduces the need for deep cleaning sessions. Even small habits, like wiping racks after use or cleaning them every few months, can make a noticeable difference.
With the right approach, you can keep your oven racks clean without spending hours scrubbing.
FAQ
FAQs on How to Clean Oven Racks Quickly
Yes, it is possible to clean oven racks with very little scrubbing if you use the right method.
Techniques like ammonia soaking rely on fumes to break down grease instead of physical effort. Hot water soaking with dish soap can also loosen residue significantly. However, most methods still require light scrubbing at the end to remove loosened grime. The key is allowing enough soaking time so the grease softens, making the final cleanup quick and easy rather than physically demanding.
The safest natural method is using baking soda and vinegar. Baking soda acts as a gentle abrasive, while vinegar creates a reaction that helps lift grease and grime from the surface.
This method avoids harsh chemicals and strong fumes, making it suitable for regular cleaning and households with limited ventilation. While it may take slightly longer than chemical methods, it is effective for light to moderate buildup.
For best results, let the mixture sit long enough before scrubbing so it can properly break down residue.
The frequency of deep cleaning depends on how often you use your oven.
For light use, cleaning every two to three months is usually enough. If you cook frequently or prepare greasy foods, monthly cleaning is more appropriate. Regular cleaning prevents grease from hardening into stubborn buildup, which is harder to remove later. Even if the racks look clean, residue can still accumulate over time.
Sticking to a consistent schedule helps maintain your oven racks and reduces the need for strong chemicals or extended soaking.
Ammonia is generally more effective for heavy, baked-on grease because it breaks down residue faster and with less scrubbing.
However, it requires careful handling due to strong fumes and safety concerns. Baking soda, on the other hand, is safer and more suitable for regular maintenance or lighter buildup. It may require more effort and time but poses fewer risks. Choosing between the two depends on the level of grime and your comfort with handling chemicals. For routine cleaning, baking soda is often sufficient.
Not all oven racks are suitable for dishwasher cleaning. While many standard metal racks can handle a dishwasher cycle, some have coatings that may be damaged by high heat or strong detergents.
Dishwashers can also cause discoloration or reduce the lifespan of certain finishes. Always check the manufacturer’s instructions before placing racks in the dishwasher. If you are unsure, it is safer to use soaking or manual cleaning methods instead. This prevents accidental damage and ensures your racks remain in good condition.
Yes, cleaning oven racks overnight is safe when using methods designed for extended soaking. Ammonia and garbage bag methods are commonly used for this purpose, as they allow grease to break down gradually without constant supervision. It is important to place racks in a sealed container or bag and keep them in a well-ventilated area.
Avoid leaving them in strong solutions longer than necessary, as prolonged exposure can affect the finish. Always rinse thoroughly the next day before placing them back in the oven.
The fastest method depends on the level of dirt.
For light buildup, using a dishwasher or scrubbing with aluminum foil and dish soap can produce quick results within an hour.
For heavier grease, ammonia works quickly in terms of effort, but it requires overnight soaking. If you need immediate results, combining baking soda and vinegar with active scrubbing is usually the fastest option. While it involves more hands-on work, it reduces waiting time compared to soaking methods.
Oven racks can be damaged if cleaned improperly or too aggressively. Frequent use of abrasive tools like steel wool can scratch the surface and make future cleaning harder. Overexposure to strong chemicals can also weaken coatings or cause discoloration.
However, regular cleaning with proper methods actually helps preserve the racks by preventing heavy buildup. The key is to use gentle tools, follow recommended soaking times, and avoid harsh chemical combinations. With proper care, frequent cleaning will not harm your oven racks.