Skip to content

Does Hydrogen Peroxide Kill Mold?
How Hydrogen Peroxide Works to Kill Mold
Hydrogen peroxide can kill or inhibit mold under the right conditions, but it is not a universal mold-removal solution.
Mold tends to thrive in damp, poorly ventilated spaces, and once it shows up, it can damage surfaces, trigger allergies, and be surprisingly persistent.
Hydrogen peroxide works by breaking down mold’s structure, making it a reliable option for light to moderate mold cleanup. But as fun as it may be to use it to get rid of mold once and for all, it has its limits.
Does Hydrogen Peroxide Kill Mold? How It Works
Yes, hydrogen peroxide can kill or inhibit mold under the right conditions, but it is not a universal mold-removal solution. Its effectiveness depends on the product concentration, formulation, contact time, surface material, and how deeply the mold has affected the material.
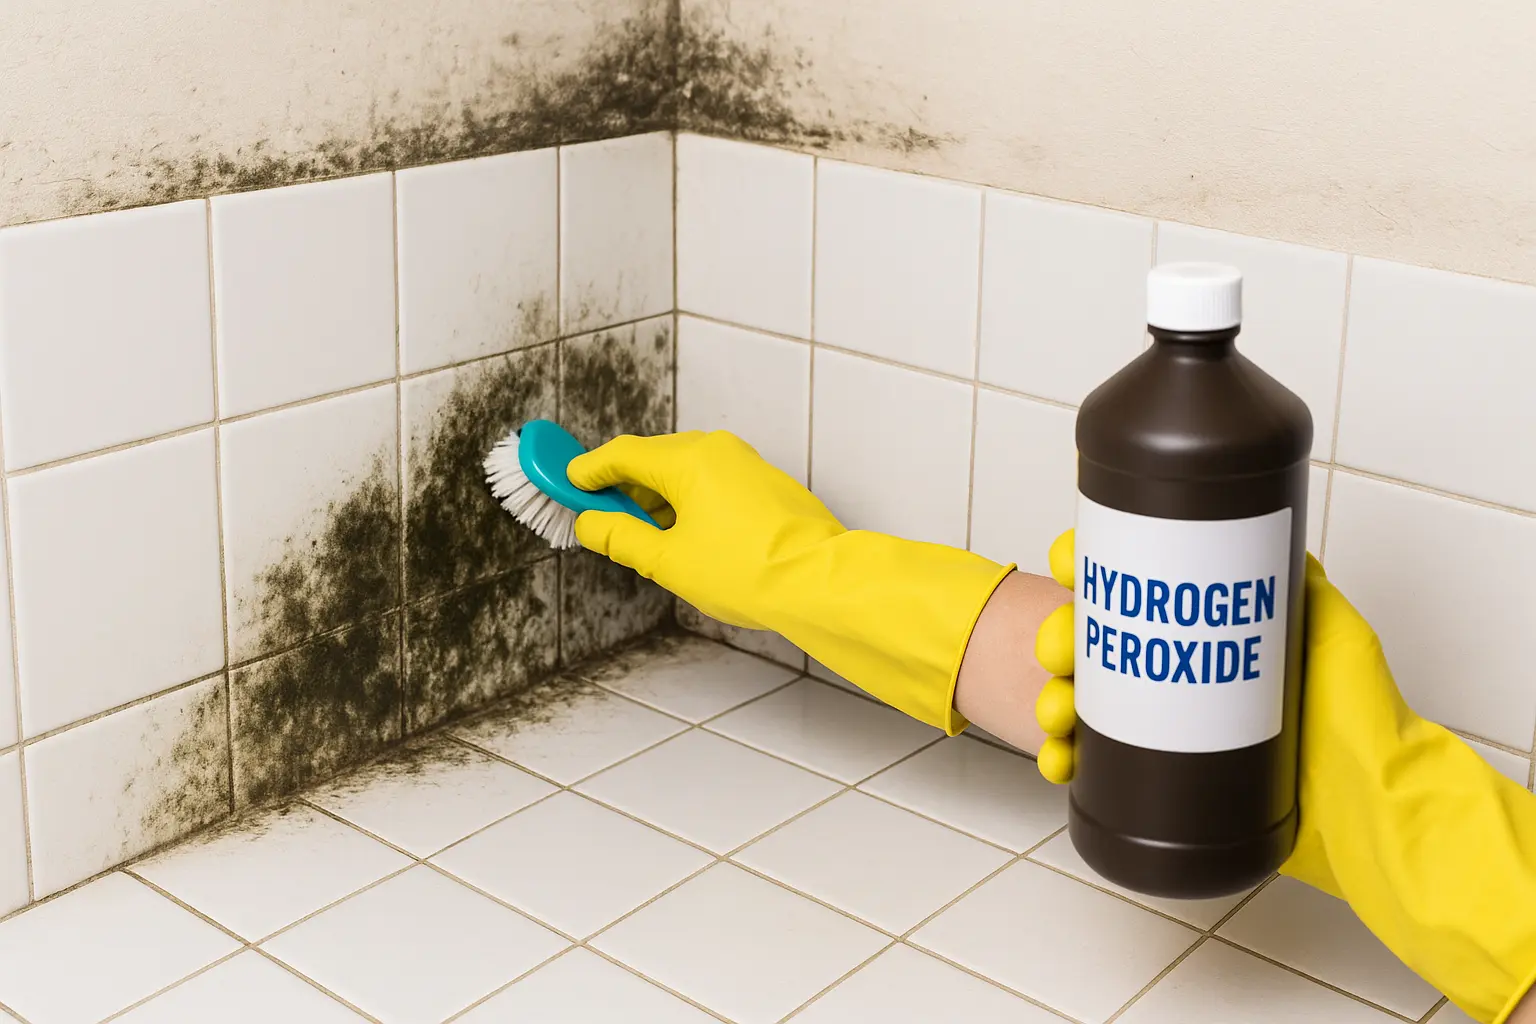
Hydrogen peroxide is an oxidizing agent. In simple terms, it can react with biological material and help damage microorganisms. Studies confirm that hydrogen peroxide could significantly reduce mold growth in non-porous surfaces such as tile, glass, and steel.
However, the visible bubbling is not a reliable way to tell whether mold has been completely killed. It can also break down into water and oxygen, so fizzing does not automatically mean the treatment is working better.
For some hard, washable materials, hydrogen peroxide may be appropriate when the product label and surface-care instructions allow it. Examples include glass, ceramic tile, stainless steel, and some hard plastics. The reason these materials may be suitable is that they are generally easier to clean and dry than porous materials, but the exact product and material instructions still control.
Porous materials like drywall, carpet, or insulation are a different story. Hydrogen peroxide can’t penetrate deep enough to reach mold growing beneath the surface. So while it might clean what you see, hidden mold can survive and return later. The Environmental Protection Agency recommends different approaches for mold affecting porous materials and notes that some moldy porous materials may need to be discarded.
So, hydrogen peroxide can be useful for certain surface-level mold problems, but spraying the visible growth does not guarantee that the entire mold problem has been removed.
If mold keeps returning, the next question should be why the area stays damp, not simply which cleaner to spray next.
How to Remove Mold with Hydrogen Peroxide Step-by-Step
If you’re tackling mold on your own, hydrogen peroxide can be a powerful ally when used correctly.
Here’s a detailed, step-by-step guide to make sure you get the best results.
Step 1: Protect Yourself Before Using Hydrogen Peroxide for Mold Removal
Safety comes first.
The Centers for Disease Control and Prevention (CDC) recommends wearing gloves, goggles, and at least an N95 respirator when cleaning up mold. This is to avoid inhaling spores or irritating fumes.
Make sure the area is well-ventilated by opening windows or turning on an exhaust fan.
Step 2: Choose the Right Hydrogen Peroxide Product
A 3% hydrogen peroxide solution is a common household concentration, but concentration alone does not make a product a registered mold disinfectant.
If you are using hydrogen peroxide for a specific antimicrobial or disinfecting purpose, check the product label for the intended use, approved surfaces, concentration, and required contact time.
Do not automatically increase the concentration or assume that a stronger solution will produce better results. Higher concentrations can increase the risk of skin, eye, and surface damage.
Use the product as supplied unless its label specifically instructs you to dilute it.
Never Mix Hydrogen Peroxide With Vinegar or Other Cleaners
Hydrogen peroxide should be used by itself. Never mix it with vinegar, bleach, ammonia, or other cleaning products.
Hydrogen peroxide is an oxidizer, while vinegar contains acetic acid. When combined, they can form peracetic acid:
CH₃COOH + H₂O₂ ⇌ CH₃COOOH + H₂O
This reaction is reversible, so the mixture can contain acetic acid, hydrogen peroxide, peracetic acid, and water. You also cannot predict its pH by averaging the pH of the two original products.
If you already mixed them, stop using the mixture. Do not add another chemical. If it is safe, move away and ventilate the area.
If the mixture touches your skin or eyes, rinse thoroughly with water. For significant exposure, persistent coughing, or trouble breathing, contact poison control or seek medical help.
Step 3: Apply Hydrogen Peroxide According to the Product Directions
Apply the hydrogen peroxide product to the affected surface according to its label or the material manufacturer’s care instructions.
Do not unnecessarily saturate the surface. Excess moisture can be especially problematic when dealing with porous materials because moisture can contribute to continued mold growth.
If the surface is drywall, carpet padding, insulation, or another porous material, do not assume that spraying the visible area will remove mold growing within the material.
Step 4: Allow the Required Contact Time
Contact time depends on the specific hydrogen peroxide product and the use listed on its label.
Do not assume that every 3% hydrogen peroxide solution needs to remain on a moldy surface for the same amount of time. If the product is labeled for antimicrobial or disinfecting use, follow its stated contact time and keep the surface wet for that required period.
Do not use bubbling or fizzing as a test of effectiveness. Hydrogen peroxide can decompose into water and oxygen, so visible bubbles do not prove that mold has been completely eliminated.
Step 5: Remove Mold and Residue
Once the peroxide has had time to work, physically remove loosened mold and residue using a method appropriate for the surface.
For hard surfaces, EPA recommends cleaning mold with detergent and water and then drying the surface completely. Follow the hydrogen peroxide product label if it gives different instructions for wiping, rinsing, or drying.
The goal is not simply to kill microorganisms. Visible mold and residue still need to be physically removed where the material can be safely cleaned.
Step 6: Wipe Away Mold Residue and Rinse the Surface
Remove loosened mold and product residue according to the product label and the surface manufacturer’s care instructions.
If rinsing is appropriate for the material and product, rinse with clean water. Otherwise, wipe the surface using the method specified by the product instructions.
Step 7: Dry the Area Completely to Prevent Mold Regrowth
Mold thrives in damp conditions, so drying is the most critical step. The EPA emphasizes that if wet or damp materials are dried within 24–48 hours of exposure, mold growth is very unlikely to take hold.
Use appropriate ventilation, towels, fans, or a dehumidifier to help dry the affected area. More importantly, fix the source of the moisture, such as a leak, condensation, flooding, or persistent humidity.
Pros and Cons of Using Hydrogen Peroxide for Mold Removal
Hydrogen peroxide is the star student of household cleaners, but even it can’t ace every mold exam.
Here’s the breakdown:

Pros of Using Hydrogen Peroxide for Mold Removal
Does Not Need to Be Mixed
Hydrogen peroxide can be used on its own when the product directions support the intended use. Never mix it with vinegar, bleach, ammonia, or other cleaning products.
Provides Oxidizing Activity
Hydrogen peroxide is an oxidizing agent that can help damage microorganisms under the right conditions.
Useful on Some Hard Surfaces
Hydrogen peroxide may be appropriate for certain hard, washable surfaces, such as glass, ceramic tile, stainless steel, or hard plastic, when the product label and surface-care instructions allow it.
Affordable and Easy to Find Mold Cleaner
It’s inexpensive, widely available at most drugstores, and doesn’t require specialty products or equipment.
Cons of Using Hydrogen Peroxide for Mold Removal
Limited Use on Porous Materials
Hydrogen peroxide doesn’t penetrate deeply into porous surfaces like drywall, carpet, or insulation, where mold can keep spreading unseen.
For these materials, the appropriate solution may involve removing the affected material, correcting the moisture source, or getting professional guidance rather than repeatedly applying hydrogen peroxide.
Risk of Surface Discoloration
On certain fabrics or finishes, hydrogen peroxide can cause bleaching or fading. In fact, a 2012 study from China confirmed that hydrogen peroxide even in low concentrations, can remove color and alter fiber structure, especially in cotton and wool fabrics.
Not Strong Enough for Large Mold Infestations
Larger, hidden, or materially affected mold problems may require a different remediation approach or professional assessment.
When Hydrogen Peroxide Is Not Enough to Kill Mold
Hydrogen peroxide may be useful for small, surface-level mold problems when the affected material can be safely cleaned and dried. It is not a substitute for addressing moisture problems or dealing with mold that has affected materials that cannot be thoroughly cleaned.
For example, one of the most common questions we hear is: does hydrogen peroxide kill mold on clothes? Yes, but with a caveat. Hydrogen peroxide may affect mold on some washable fabrics, but it can also lighten dyes or affect certain fibers.
If you’ve noticed mold returning again and again, or spreading beyond what you can safely clean, it may be time to admit that DIY methods have their limits.
Signs That Hydrogen Peroxide Won’t Solve Your Mold Problem
-
Large Mold Infestations: EPA guidance generally treats areas under about 10 square feet as situations that homeowners may often be able to address themselves. Larger areas, substantial water damage, or more complicated contamination should be evaluated using EPA remediation guidance and may warrant professional help.
-
Hidden Mold Growth: Mold can spread behind walls, ceilings, flooring, or HVAC ducts, where peroxide can’t reach.
-
Moisture-Driven Mold: Leaks, past flooding, or ongoing humidity problems lead to recurring growth that peroxide alone can’t prevent.
-
Health Concerns from Mold Exposure: People with allergies, asthma, immune suppression, or certain underlying lung conditions may be more vulnerable to mold exposure. If someone in the home is experiencing significant symptoms, seek appropriate medical guidance rather than relying on repeated DIY treatments.
We’ve seen this firsthand with one of our clients in Denver, who tried treating bathroom mold with hydrogen peroxide several times.
While it cleared the surface temporarily, the mold kept returning, especially in the grout and behind caulking. That’s when Roochii Cleaning came in, and our team stepped in with commercial-grade cleaners, HEPA filtration, and moisture control solutions to eliminate the problem for good.
If peroxide isn’t working, professional help ensures the mold is not just cleaned up but fully eliminated to protect your health and home.
Mold Prevention Tips After Using Hydrogen Peroxide

Killing mold with hydrogen peroxide is only half the battle. The real thing that needs your focus is keeping it from coming back.
Mold thrives on moisture, poor ventilation, and neglected surfaces, so prevention is about breaking that cycle.
Here are some proven prevention strategies to use after peroxide treatment:
Improve Airflow and Ventilation
Run an exhaust fan during and after showers, or crack open a window to reduce humidity.
In high-risk areas like basements or bathrooms, consider using a dehumidifier to keep moisture levels under control.
Keep Surfaces Dry
As absurd as it might seem, even tiny amounts of leftover water can give mold a foothold.
Wipe down shower walls, tiles, and sinks after use with a squeegee or microfiber cloth. Fix any dripping faucets or leaks right away.
Maintain a Consistent Cleaning Routine
Sometimes the key to a cleaner and healthier home is… cleaning! Regular cleaning helps remove dirt and residue that can accumulate in damp areas. Choose a cleaner that is appropriate for the specific surface instead of automatically reaching for vinegar, baking soda, peroxide, or another chemical.
If you use baking soda for light scrubbing, remember that sodium bicarbonate is mildly alkaline and abrasive. It may be appropriate for uncoated ceramic tile, porcelain sinks or tubs, and some stainless steel sinks when used gently with plenty of water, but it can scratch or dull glass, mirrors, marble, limestone, travertine, aluminum, copper, brass, painted finishes, appliance coatings, and other delicate surfaces.
Address Small Issues Quickly
It’s easier to solve problems when they’re still small and doesn’t stress you out the whole day (or week). Don’t wait for little problems to become big ones.
Cracked tiles, worn caulking, or slow leaks are issues that are very fixable when they’re small, but can lead to hidden mold growth if ignored.
The Bottom Line: Is Hydrogen Peroxide the Best Mold Remover?
Hydrogen peroxide can help kill or inhibit mold on some hard, washable surfaces when the product, concentration, contact time, and surface instructions support its use. It is not a universal mold-removal solution, especially when mold affects porous materials or keeps returning because of an unresolved moisture problem.
Use hydrogen peroxide by itself, never mix it with vinegar or other cleaners, remove visible residue where the material can be safely cleaned, and dry the area completely.
If mold is widespread, hidden, recurring, or affecting materials that cannot be thoroughly cleaned, use a remediation approach appropriate for the size, material, and moisture conditions involved.
FAQ
FAQs About Hydrogen Peroxide and Mold Removal
Hydrogen peroxide can kill or inhibit mold under the right conditions, but the color of the mold does not determine whether a household peroxide treatment is appropriate. The surface, product concentration, contact time, and depth of the growth matter more.
Yes, hydrogen peroxide can kill mold spores on surfaces by breaking down their protective outer layer through oxidation. But it won’t neutralize airborne spores.
No. Do not mix hydrogen peroxide and vinegar. Hydrogen peroxide is an oxidizer, while vinegar contains acetic acid. Their reaction can form peracetic acid, so combining them creates chemistry that is different from either product alone.
Not every fabric is suitable for hydrogen peroxide. Oxidizing chemicals can lighten dyes or alter some fibers, including certain cotton and wool materials. Follow the fabric manufacturer's care instructions and use a product intended for the material.
Hydrogen peroxide may be useful for some mold on hard, washable shower surfaces such as ceramic tile or glass when the product and surface instructions allow it. Grout, sealants, painted finishes, and other materials need more specific consideration. Remove the visible residue and dry the area completely after cleaning.
There is no universal contact time for every hydrogen peroxide product. Follow the exact contact time on the product label when the product is labeled for antimicrobial use. Do not use bubbling as an indication that the treatment has worked.
Do not rely on repeated peroxide treatments as a mold-prevention strategy. If mold returns, investigate the moisture source, such as a leak, condensation, flooding, or persistent humidity. Recurring or widespread mold may require a different remediation approach.