Skip to content


How to Remove Mold From a Ceiling Safely: Step-by-Step Guide
Is It Possible to Remove Mold From Your Ceiling?
Wondering how to remove mold from a ceiling? You can remove a small patch of mold from a ceiling only when the affected surface is intact, washable, and safe to reach.
For a sound, washable finish with limited surface growth, gently clean with mild detergent and water, wipe away residue, and dry it completely. If the ceiling is soft, peeling, crumbling, repeatedly moldy, or wet from a leak, surface cleaning is not enough. Have the damage assessed before disturbing it.
The goal is not to find the strongest mold-killing spray. It is to determine whether the ceiling can be cleaned, remove visible growth where appropriate, and fix the moisture that allowed it to develop.
After all, mold rarely takes the hint and leaves for good just because you cleaned up after it.
In this guide, you will find a practical DIY safety check, ceiling-specific cleaning steps, product and surface compatibility advice, and ways to keep bathroom ceiling mold from returning.
Table of Contents
- Can You Remove Mold From a Ceiling Yourself
- How to Tell Whether Your Ceiling Has Mold
- What You’ll Need for Surface-Level Ceiling Mold
- How to Remove Mold From a Washable Ceiling: Step by Step
- Which Ceiling Materials Can Be Cleaned?
- Is Vinegar, Peroxide, Bleach, or Baking Soda Better for Ceiling Mold
- How to Prevent Mold From Returning to the Bathroom Ceiling
- When to Call a Professional

Can You Remove Mold From a Ceiling Yourself?
A small, isolated patch on an intact, washable hard surface may be a manageable DIY cleanup.
The U.S. Environmental Protection Agency (EPA) says areas smaller than about 10 square feet, roughly 3 by 3 feet, can often be handled by the homeowner. However, it is not a guarantee that every small patch is safe to clean.
Before deciding, look at the ceiling material, the water source, and whether anyone in the home has a condition that increases their risk from mold exposure.
The CDC advises people with asthma, chronic lung disease, allergies, or weakened immune systems not to participate in mold cleanup.
Can You Remove Ceiling Mold Yourself?
Compare your ceiling with these three situations before starting cleanup. When in doubt, choose the safer option.
| Ceiling condition | Decision | What to do next |
|---|---|---|
| Small patch, intact surface Less than about 10 sq. ft., sound washable finish, no water damage or hidden leak suspected, and safe physical access. | ✓ DIY may be reasonable | If you can clean safely, wear an N95 respirator, gloves, and eye protection. Gently clean approved washable surfaces with mild detergent and water. Dry completely and correct the moisture source. |
| Recurring or uncertain mold Mold keeps returning, moisture source is unclear, paint may be fragile, or the ceiling is difficult to reach safely. | ! Investigate first | Identify condensation or leaks and check the ceiling material before cleaning. If access is unsafe, damage may be hidden, or growth keeps recurring, request a qualified assessment. |
| Wet, damaged, or widespread mold Waterlogged drywall, moldy acoustic tiles, soft or crumbling material, contaminated-water damage, or growth larger than about 10 sq. ft. | × Professional assessment | Do not scrub, spray, scrape, or disturb damaged materials. Arrange qualified water-damage and mold remediation assessment. Suspect older ceiling coatings or textures also require special care before disturbance. |
Safety note: The EPA's roughly 10-square-foot guideline is not a guarantee that DIY cleanup is safe. Material condition, water source, access, and personal health also matter. People with asthma, COPD, mold allergies, or weakened immune systems should not perform mold cleanup. EPA cleanup guidance | CDC safety guidance
Signs you should stop and get help
- The affected area is larger than about 10 square feet, widespread, or difficult to access without a safe working platform.
- Drywall, plaster, or ceiling tiles are damp, soft, swollen, flaking, or crumbling.
- A roof or plumbing leak, contaminated water, or hidden moisture may have affected the back of the ceiling.
- The patches return after cleaning, there is a persistent musty smell, or the cause remains unclear.
- You may need to scrape an older textured finish or disturb paint or ceiling materials that could contain asbestos or lead.
A mold-remediation specialist or qualified water-damage contractor can assess hidden growth and damaged materials. A general house-cleaning service is not automatically qualified to perform structural mold remediation.
How to Tell Whether Your Ceiling Has Mold
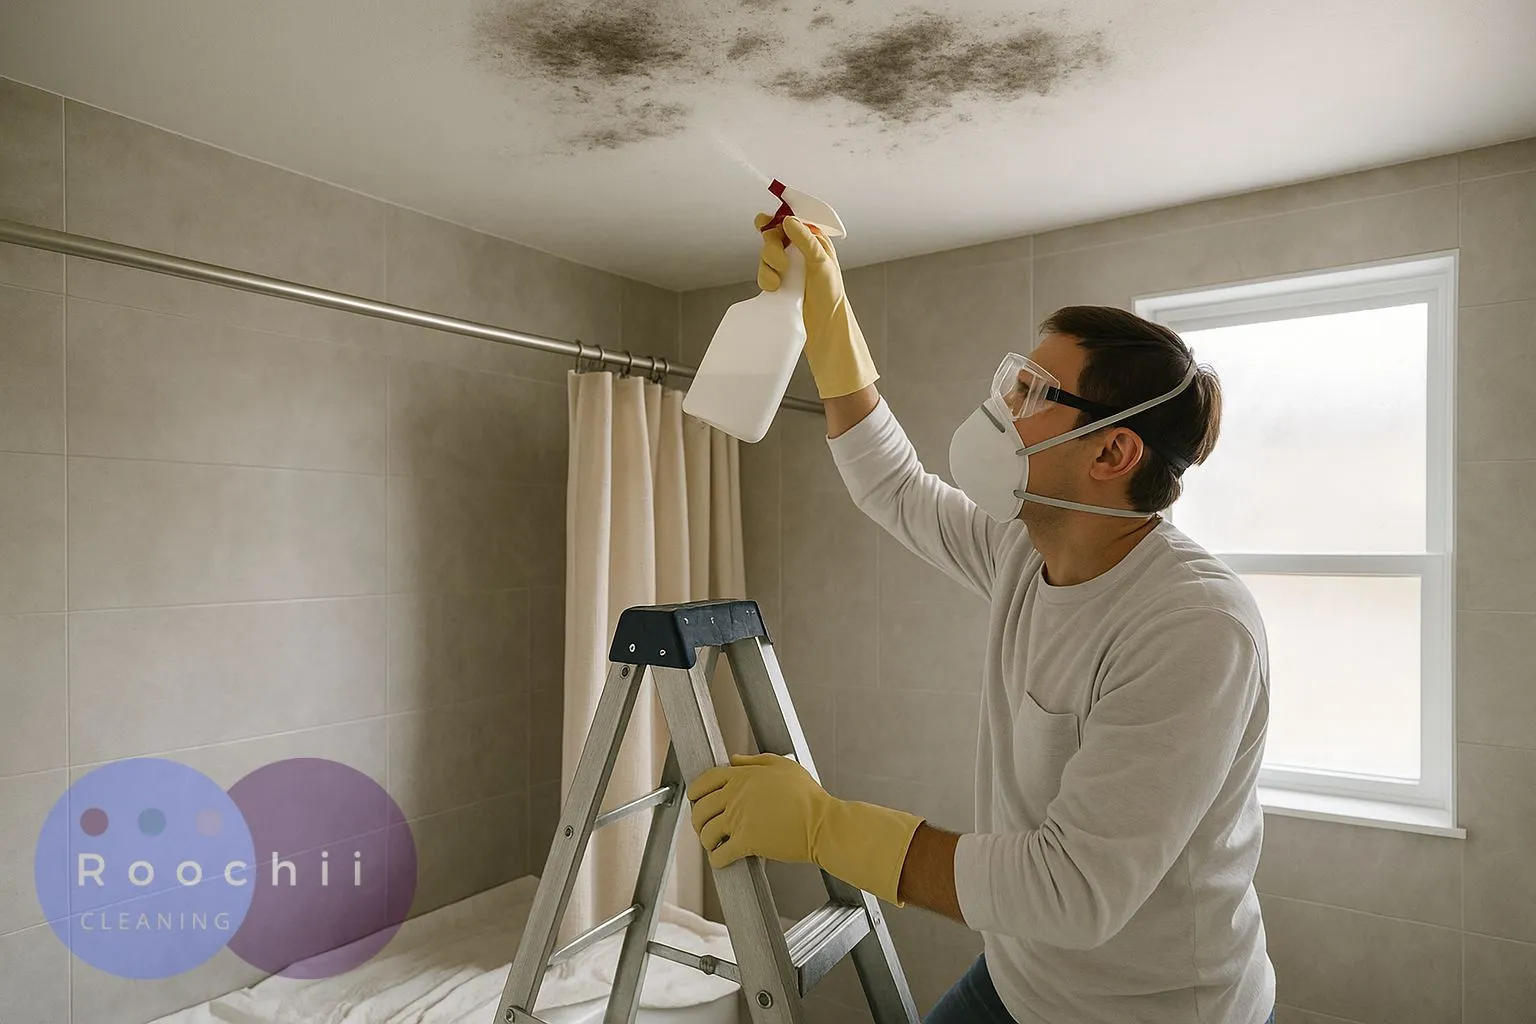
Mold may look like speckles or irregular patches in black, gray, green, or brown. A musty odor, dampness, staining, or repeated growth near a bathroom ceiling corner can be a clue.
Color and appearance alone cannot identify a mold species or determine how hazardous it is. Water stains, soot, and dirt can sometimes look similar.
Check what is causing the moisture: shower condensation where ventilation is poor, a roof leak near an attic or exterior wall, plumbing above the ceiling, or condensation around an uninsulated cold area.
Steam does not simply stay at the ceiling because it rises; warm humid air can condense when it contacts a cooler surface.
Do you need a mold test?
Usually not for clearly visible mold.
The EPA generally advises against routine sampling when growth is already visible because the priority is to clean up the mold and repair the water problem.
If growth is hidden, its extent is uncertain, or an inspection will change the repair plan, discuss targeted assessment with an experienced professional.
What You’ll Need for Surface-Level Ceiling Mold
Before tackling a small patch of mold, make sure you have the right protective gear, cleaning supplies, and a safe way to reach the affected area.
The following covers the essentials for cleaning limited surface growth on an intact, washable ceiling:
- A properly fitted NIOSH-approved N95 respirator, non-vented protective goggles, and protective gloves.
- A stable platform or properly positioned step ladder. Avoid leaning or overreaching.
- Plastic sheeting or another washable covering for nearby items and floors.
- Mild detergent approved for the surface, clean water, soft cloths or a nonabrasive sponge, and dry towels.
- A trash bag for contaminated disposable materials, plus a way to reduce the original moisture source.
Keep children and pets away from the work area. If the ceiling cannot be cleaned safely from a stable position, hire someone qualified.
Do not point an ordinary household fan across visible mold while scrubbing, since it can spread disturbed material around the room.
How to Remove Mold From a Washable Ceiling: Step by Step
Use these steps only for limited surface growth on an intact, washable finish.
A porous, damaged, or water-saturated ceiling may need professional removal or replacement instead of wiping.
1. Find and address the moisture source
Check for leaks and active condensation before cleaning.
Repair leaks promptly and improve bathroom exhaust or dehumidification where needed. If a leak is still active or the ceiling is wet, stop until the building problem has been addressed.
2. Put on protection and prepare the area
Wear your N95 respirator, goggles, and gloves. Cover items below the ceiling and use a stable platform.
If using a cleaning product, follow its label and provide fresh air where practical without blowing air directly across contaminated material.
3. Wipe gently with mild detergent and water
Dampen a soft cloth or sponge with detergent solution rather than spraying liquid upward.
Gently remove visible mold from the washable surface. Use minimal liquid so moisture does not soak into seams, drywall edges, or paint defects.
Do not dry-brush, sand, scrape, or pressure-wash the growth.
4. Remove residue and dry thoroughly
Wipe with a separate, lightly dampened cloth if the product label and finish allow it. Use clean towels to dry the surface.
Keep the underlying moisture under control and check that the ceiling remains dry. Moisture is mold’s best friend, so continued dampness defeats the cleanup.
5. Contain used materials and monitor the ceiling
Bag heavily contaminated disposable wipes or covers before discarding them.
Clean reusable tools as appropriate, remove protective gear without touching contaminated sides, and wash your hands.
Reinspect the area over the following weeks. If visible growth returns or staining spreads, investigate hidden moisture rather than repeating surface treatment.
Which Ceiling Materials Can Be Cleaned?
Not every ceiling material responds to mold cleaning in the same way. The right approach depends on whether the surface is washable, porous, textured, or damaged by moisture.
Before cleaning, identify your ceiling material to determine whether surface cleaning is appropriate or professional assessment is needed.
Intact, washable painted ceiling
A small, superficial patch may be removable if the paint is fully bonded, the finish can withstand gentle damp cleaning, and there is no evidence of moisture beneath it.
Check the paint manufacturer’s cleaning instructions. Stop if the paint softens, rubs off, bubbles, or exposes the paper facing of drywall.
Moldy drywall, plaster, and acoustic ceiling tiles
Drywall paper and many acoustic ceiling tiles are porous.
Once mold penetrates these materials or prolonged water damage is present, wiping the face may leave contamination inside.
A qualified specialist may need to remove and replace affected sections. Damaged plaster and waterlogged gypsum also require material assessment.
Textured, popcorn, or delicate decorative ceilings
Do not scrape or sand a textured ceiling to remove mold. Older finishes may contain asbestos, and disturbed paint in pre-1978 homes may create lead dust.
Have suspect materials assessed before any disruptive work.
Delicate wallpaper, untreated wood, and fragile coatings also require specialist or manufacturer advice.
Tile or other hard, nonporous ceiling finishes
Glazed ceramic tile and similar nonporous, chemical-compatible finishes can usually tolerate mild detergent and water, followed by thorough drying.
Inspect porous grout, sealants, metal trim, and the material behind the tile separately; those areas may need additional evaluation or repair.
Is Vinegar, Peroxide, Bleach, or Baking Soda Better for Ceiling Mold?
For small mold patches on intact, washable ceilings, mild detergent and water are usually the best starting point.
The EPA does not recommend bleach for routine mold cleanup. Removing visible growth, drying the surface, and fixing the moisture source matter more than using stronger chemicals.
Vinegar is acidic and can damage certain finishes. Hydrogen peroxide may discolor paint, bleach can damage coatings and metals, and baking soda can scratch delicate surfaces. None of these products reliably removes mold embedded in porous drywall.
Never Mix Cleaning Products
Never mix bleach with vinegar or ammonia because toxic gases can form. Vinegar and hydrogen peroxide can also react to produce irritating peracetic acid:
CH3COOH + H2O2 ⇌ CH3COOOH + H2O
A homemade mixture is not equivalent to a formulated commercial disinfectant, and mixture pH cannot be calculated by simply averaging the ingredients.
Use one product, wipe or rinse away residue if the surface and label allow it, and let the area dry completely before considering another cleaner. Never layer wet cleaning products.
What If You Accidentally Mix Cleaners?
Stop cleaning, move to fresh air, and keep others away.
Do not add another chemical to neutralize the mixture or open a potentially pressurized container. Ventilate only if safe.
For exposure advice in the United States, call Poison Control at 1-800-222-1222. Seek emergency help for serious breathing symptoms. If chemicals enter your eyes, begin rinsing with running water and seek prompt guidance.
Accidentally Mixed Cleaners?
Follow these steps if cleaning products were combined by mistake.
- 01 Stop cleaning immediately Do not add more cleaner, water, or another chemical to try to neutralize the mixture.
- 02 Leave the area Move to fresh air and keep children, pets, and other people away. Ventilate only if you can do so safely without re-entering.
- 03 Leave the mixture alone Do not touch or attempt to dispose of the mixture without expert advice. Never open a sealed container that may have built up pressure.
Call emergency services
Serious symptoms require immediate medical assistance. Do not re-enter the affected area.
Call 911 (US)Contact Poison Control
Even if symptoms are mild or exposure is uncertain, get advice on the products involved and what to do next.
1-800-222-1222 (US)How to Prevent Mold From Returning to the Bathroom Ceiling
Getting rid of existing mold is only part of the solution. Preventing ceiling mold starts with controlling moisture.
Once the affected surface has been cleaned and dried, focus on ventilation, humidity, condensation, and leak prevention to reduce the chance of mold returning.
- Run a bathroom exhaust fan during showers and long enough afterward to clear humid air; confirm that the duct vents outdoors, not into an attic.
- Keep indoor relative humidity below 60%, ideally around 30% to 50%, and use a hygrometer to track it.
- Repair roof and plumbing leaks quickly. Dry wet building materials within 24 to 48 hours when possible.
- Investigate repeated ceiling condensation and insulation gaps rather than just wiping away each new patch.
- After the mold has been removed, the surface is dry, and the water problem is corrected, use a suitable bathroom primer or paint only if compatible with the surface.
- Check repaired areas periodically, especially after storms, freezing weather, or heavy shower use.
Keeping the ceiling dry matters more than choosing a stronger cleaner.
If the source is a leak inside the assembly, ventilation and surface wiping will not solve it.
Ceiling Mold Checklist & Moisture Tracker
Check whether a ceiling patch needs professional attention, then track humidity, ceiling condition, and repairs over seven days.
When to Call a Professional
Signs You Need a Mold Specialist
Contact a qualified mold-remediation or water-damage professional if:
-
Extensive mold growth: Mold covers a large area or keeps spreading.
-
Damaged ceiling materials: Drywall, ceiling tiles, or other materials are wet, soft, or deteriorating.
-
Hidden mold: You suspect moisture or mold behind the ceiling.
-
Recurring mold: Growth keeps returning despite cleaning.
-
Contaminated water: The damage involves sewage or other contaminated water.
Before hiring, ask whether the specialist investigates moisture sources, safely handles affected materials, and documents the work.
When Regular Cleaning Is Enough
After a qualified specialist completes any necessary mold remediation, a regular cleaning service can help with routine housekeeping.
For everyday household cleaning, Roochii’s Denver cleaning team provides general cleaning services.
However, standard deep cleaning does not include mold inspection, testing, demolition, or remediation unless explicitly offered by the provider.
The Bottom Line: Maintaining a Mold-Free Home
Small, surface-level mold on an intact washable ceiling may be removable with careful cleaning and complete drying.
Mold in damp or damaged drywall, widespread growth, or a problem that keeps coming back needs more than a stronger cleaning solution.
Fix the moisture source and choose professional remediation when the ceiling material or exposure risk makes DIY cleanup unsuitable.
FAQ
FAQs About Ceiling Mold Removal
Vinegar has acidic cleaning properties, but it is not a dependable substitute for physically removing mold and drying the affected material.
On delicate paint, stone, grout, and some metals, acidity can cause damage. For a small washable ceiling patch, detergent and water are the clearer first choice.
Bleach is not a routine recommendation for ceiling mold cleanup.
It can harm finishes, gives off irritating fumes, and does not repair damp drywall or other porous materials.
Keep children and animals out of the work area.
An adult without increased mold-exposure risk should assess whether the job is appropriate, use a fitted N95 respirator, goggles, and gloves, and avoid unnecessary chemicals.
If there is substantial damage or a vulnerable family member, use qualified professional help.
There is no reliable universal timeline. If moisture remains, mold can return.
Investigate a repeat patch rather than simply cleaning it again.
Seek professional assessment if the area is larger than about 10 square feet, you cannot safely reach it, the ceiling is soft or saturated, there is a leak or sewage-related damage, growth recurs, or someone in the household is at higher risk from mold exposure.
Exposure to dampness and mold can trigger allergic symptoms, respiratory irritation, and asthma symptoms in susceptible people.
Individuals with immune suppression or underlying lung disease may face additional risks.