Skip to content

Moving Out of State? The Complete Checklist Before You Leave Your Home

Why Moving Out of State Doesn’t Have to Be Overwhelming
Moving out of state is exciting, but it can also feel overwhelming. Between coordinating movers, packing your belongings, updating important documents, transferring utilities, and preparing your home before handing over the keys, it’s easy for even small tasks to pile up.
One of the biggest challenges isn’t the move itself. It’s trying to juggle everything at once. Without a plan, important details, scheduling a move-out cleaning, or completing a final walkthrough can easily slip through the cracks, adding unnecessary stress during an already busy time.
Luckily, a successful move doesn’t have to be chaotic. Breaking the process into smaller, manageable steps helps you stay organized and make the transition much smoother. From our experience, homeowners who start early, declutter before packing, and leave enough time to properly clean their home often find moving day far less stressful.
In this guide, we’ll walk you through everything you need to do before moving out of state, from planning your timeline and packing efficiently to completing a thorough move-out cleaning and preparing your home for its final walkthrough.
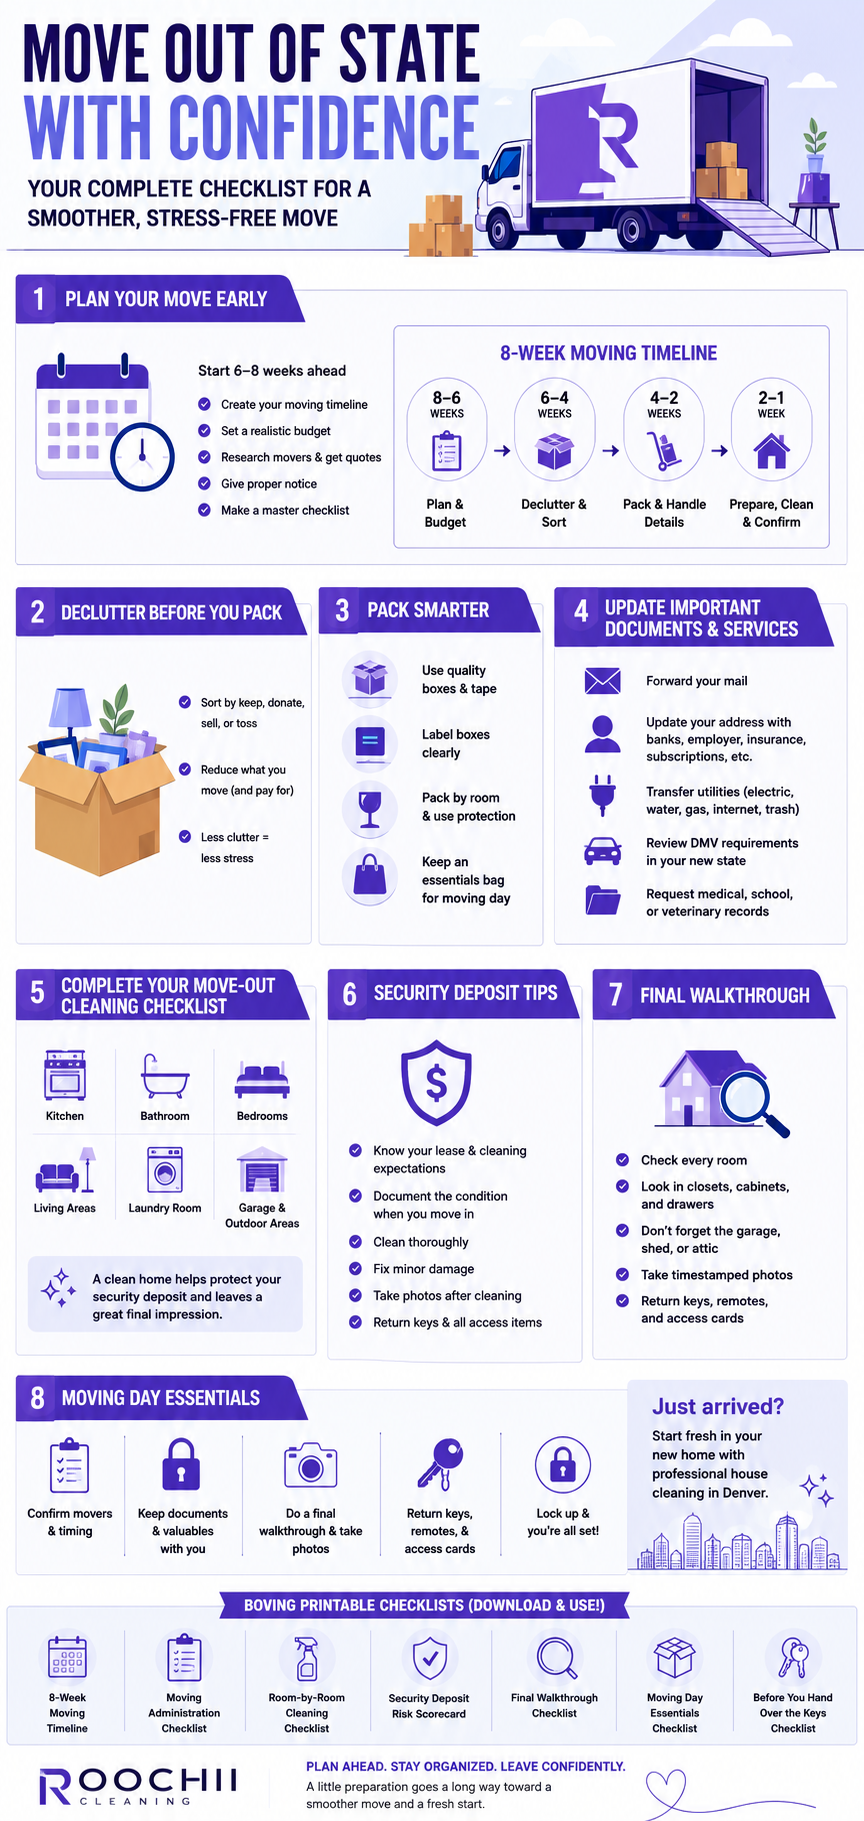
The 8-Week Moving Timeline
A successful interstate move isn’t built on a single moving day. It’s the result of thoughtful planning, steady preparation, and completing the right tasks at the right time.
Following a clear timeline helps you stay organized, avoid costly oversights, and keep the entire moving process manageable from start to finish.
8 Weeks Before Moving
- Set your moving date.
- Create a moving budget.
- Research and book interstate movers.
- Start researching your new city.
- Create a moving binder or digital checklist.
6 Weeks Before Moving
- Declutter each room.
- Sell, donate, or recycle unwanted items.
- Gather moving boxes and packing supplies.
- Notify your landlord if you’re renting.
- Schedule time off work if needed.
4 Weeks Before Moving
- Begin packing non-essential items.
- Schedule utility shutoff and transfer dates.
- Update your mailing address.
- Transfer school and medical records.
- Refill prescriptions before your move.
2 Weeks Before Moving
- Confirm your moving company.
- Finish packing most rooms.
- Arrange pet or child care for moving day if needed.
- Deep clean areas you’ve already emptied.
- Prepare an essentials box.
Final Week
- Empty and clean the refrigerator.
- Defrost the freezer if necessary.
- Finish your move-out cleaning.
- Complete your final walkthrough.
- Return keys, garage remotes, and access cards.
- Take photos of the property’s condition before leaving.
Pro Tip: Try to finish your deep cleaning after your furniture has been removed. Empty rooms make it much easier to clean baseboards, closets, cabinets, appliances, and flooring thoroughly.
| Timeline | Checklist |
|---|---|
| 8 Weeks Before |
☐ Set your moving date. ☐ Create a moving budget. ☐ Research and book interstate movers. ☐ Research your new city. ☐ Create a moving binder or digital checklist. |
| 6 Weeks Before |
☐ Declutter each room. ☐ Sell, donate, or recycle unwanted items. ☐ Gather moving boxes and packing supplies. ☐ Notify your landlord if you're renting. ☐ Schedule time off work if needed. |
| 4 Weeks Before |
☐ Begin packing non-essential items. ☐ Schedule utility shutoff and transfer dates. ☐ Update your mailing address. ☐ Transfer school and medical records. ☐ Refill prescriptions before your move. |
| 2 Weeks Before |
☐ Confirm your moving company. ☐ Finish packing most rooms. ☐ Arrange pet or child care if needed. ☐ Deep clean emptied areas. ☐ Prepare an essentials box. |
| Final Week |
☐ Empty and clean the refrigerator. ☐ Defrost the freezer if necessary. ☐ Finish your move-out cleaning. ☐ Complete your final walkthrough. ☐ Return keys, garage remotes, and access cards. ☐ Take photos of the property's condition before leaving. |
Create Your Moving Plan
One of the easiest ways to reduce moving stress is to create a realistic plan as soon as you know you’re relocating. A little organization early on can save hours of frustration later.
Set a Realistic Budget
Interstate moves involve more than hiring a moving truck. Build a budget that includes both expected expenses and a small emergency fund for surprises.
Common moving costs include:
- Professional movers or truck rental
- Fuel and travel expenses
- Hotel accommodations
- Packing supplies
- Utility deposits
- Storage fees, if needed
- Move-out cleaning
- New home cleaning
- Pet transportation
- Vehicle shipping, if applicable
Keeping everything in one budget helps prevent unexpected expenses from piling up during the final weeks.
Book Movers Early
If you’re moving during summer or around major holidays, reputable interstate movers often book several weeks in advance.
Before hiring a moving company:
- Verify their USDOT registration
- Read recent customer reviews
- Ask whether the estimate is binding or non-binding
- Confirm insurance coverage
- Request a written estimate
Booking early also gives you more flexibility when comparing prices and choosing a moving date that works best for your schedule.
Create a Moving Command Center
Instead of keeping receipts, contracts, and checklists scattered across emails and sticky notes, keep everything in one place.
Your moving folder should include:
- Moving contracts
- Inventory lists
- Utility confirmation numbers
- Hotel reservations
- Important receipts
- Lease or closing documents
- Contact information for movers
- Emergency contacts
Having everything organized makes moving day far less stressful when you need information quickly.
Focus on Progress, Not Perfection
One mistake many people make is trying to complete everything in one weekend.
Breaking your move into smaller tasks keeps the process manageable and helps you avoid last-minute scrambling.
Even checking off one or two items each day keeps you moving forward and makes the final week much less overwhelming.
Declutter Before You Pack
Before you start filling boxes, take time to decide what’s actually worth bringing to your new home. Every item you pack adds weight, takes up space, and increases the time and cost of your move. Decluttering first helps you move more efficiently while giving you a fresh start in your new home.
Many homeowners are surprised by how much they no longer need once they begin sorting through their belongings. Moving is the perfect opportunity to lighten the load.
Sort Everything Into Four Categories
As you work through each room, sort your belongings into four simple categories:
Keep
Pack items you use regularly or truly value.
Examples include:
- Everyday clothing
- Important documents
- Frequently used kitchenware
- Furniture that fits your new home
- Sentimental items you genuinely want to keep
Donate
Many gently used items can benefit someone else instead of taking up space during your move.
Consider donating:
- Clothing in good condition
- Books
- Toys
- Small furniture
- Kitchenware
- Home décor
Local charities, shelters, and nonprofit organizations often accept these donations.
Sell
Selling larger or valuable items can help offset moving expenses.
If replacing an item would cost less than transporting it across state lines, selling it may be the better option.
Recycle or Dispose
Some belongings simply aren’t worth moving.
It’s best to recycle or properly dispose of items such as broken electronics and damaged furniture.
Always check your local recycling guidelines before disposing of electronics, batteries, paint, or hazardous household materials.
Focus on One Room at a Time
Decluttering your entire home at once can quickly become overwhelming. Instead, complete one room before moving to the next.
A simple order works well:
- Guest rooms
- Storage areas
- Closets
- Bedrooms
- Bathrooms
- Living areas
- Kitchen
Starting with less frequently used spaces allows you to build momentum while keeping your everyday routines relatively uninterrupted.
One thing we frequently notice during move-out cleanings is that clutter tends to hide the areas that need the most attention. Cabinets packed with unused items, overfilled closets, and crowded countertops often conceal dust, spills, and grime that only become visible after everything has been removed.
Decluttering before packing not only reduces what you have to move, but also makes it much easier to complete your final cleaning later.
Pack Smarter for an Interstate Move
Packing isn’t just about fitting everything into boxes. A thoughtful packing system protects your belongings, makes unpacking easier, and reduces stress once you arrive at your new home.
Start With Items You Use Least
Begin packing seasonal decorations, guest room items, books, and decorative pieces several weeks before moving day. Leave everyday essentials until the final few days.
This approach keeps your home functional while steadily reducing the amount left to pack.
Label Boxes Clearly
Instead of writing only the room name, include a brief description of what’s inside.
For example:
Kitchen
- Mixing bowls
- Baking supplies
- Serving dishes
or
Bedroom
- Winter clothes
- Extra blankets
- Shoes
Clear labels make unpacking much faster and reduce the need to open multiple boxes looking for one item.
Pack an Essentials Box
Your first night in a new home shouldn’t involve searching through twenty boxes just to find toothpaste.
Prepare one clearly labeled box or suitcase containing:
- Medications
- Phone chargers
- Toiletries
- Change of clothes
- Important documents
- Basic cleaning supplies
- Paper towels
- Snacks and water
- Pet food and supplies, if applicable
Keep this box with you instead of loading it onto the moving truck whenever possible.
Protect Fragile Items Properly
Wrap delicate belongings individually using packing paper, bubble wrap, or towels.
Clearly label boxes containing fragile items and avoid overpacking them. Heavy boxes are more likely to break during loading and unloading.
For electronics, photograph cable connections before disconnecting everything. Reconnecting televisions, computers, or entertainment systems becomes much easier when you have a visual reference.
Create a Simple Inventory
Keeping track of your belongings helps reduce stress if something is misplaced during the move.
A basic inventory can include:
- Box number
- Room
- General contents
- High-value items
Many homeowners simply use a spreadsheet or notes app, while others prefer printable inventory sheets.
You don’t have to document every spoon. This practice simply makes unpacking and locating important belongings much easier.
Packing Priority Matrix
| Pack First | Pack Later | Keep With You |
|---|---|---|
| Seasonal clothes | Everyday clothing | IDs & passports |
| Holiday décor | Daily toiletries | Prescription medications |
| Books | Coffee maker | Phone chargers |
| Guest room items | Basic cookware | Financial documents |
| Decorative items | Cleaning supplies | Laptop & valuables |
Update Your Address and Important Documents
Packing boxes is only part of an interstate move. Before you settle into your new home, you’ll also need to update important records, transfer services, and notify the organizations that rely on your current address. Taking care of these tasks before moving day helps prevent missed bills, interrupted services, and unnecessary stress after you arrive.
Rather than waiting until the last minute, work through these updates over the weeks leading up to your move.
Be sure to:
- Submit a USPS mail forwarding request.
- Update your address with your bank, employer, insurance providers, and subscription services.
- Schedule utility disconnections and transfers for electricity, water, gas, internet, and trash collection.
- Review your new state’s requirements for updating your driver’s license and vehicle registration.
- Request any medical, school, or veterinary records you’ll need after the move.
Taking care of these updates ahead of time makes settling into your new home much easier and helps you focus on the move itself instead of paperwork.
Complete Your Move-Out Cleaning Checklist
Packing may be finished, but your move isn’t over just yet. Before handing over the keys, take time to thoroughly clean your home. A clean home creates a better final impression and can help you avoid unnecessary deductions from your security deposit or requests for additional cleaning.
A lot of our clients have underestimated how long move-out cleaning takes. Once furniture has been removed, empty rooms reveal dust behind appliances, scuff marks along baseboards, and grime inside cabinets that often go unnoticed. Leaving enough time to clean these areas properly can make your final walkthrough much less stressful.
The best time to deep clean is after your belongings have been moved out. Empty rooms provide full access to walls, floors, cabinets, and appliances, making it easier to clean thoroughly without moving furniture or packed boxes.
Room-by-Room Move-Out Cleaning Checklist
A thorough move-out cleaning is much easier when you tackle one room at a time. Use this checklist to make sure nothing gets overlooked before your final walkthrough.
| Area | Checklist |
|---|---|
| Kitchen |
☐ Empty & wipe cabinets and drawers ☐ Clean countertops & backsplash ☐ Degrease stovetop & range hood ☐ Clean oven (inside & out) ☐ Sanitize refrigerator ☐ Wipe microwave ☐ Clean dishwasher filter & door ☐ Sanitize sink & faucet ☐ Mop the floor |
| Bathroom |
☐ Scrub shower & bathtub ☐ Clean grout & tile ☐ Disinfect toilet ☐ Wipe mirrors ☐ Clean sink & vanity ☐ Remove soap scum ☐ Empty cabinets ☐ Sweep & mop floors |
| Bedroom |
☐ Vacuum carpets ☐ Sweep or mop floors ☐ Wipe baseboards ☐ Remove nails/hooks if required ☐ Dust closet shelves ☐ Clean windowsills ☐ Check closets |
| Living Areas |
☐ Dust ceiling fans ☐ Wipe doors & trim ☐ Remove cobwebs ☐ Vacuum floors ☐ Clean windows & tracks ☐ Wipe light switches ☐ Dust vents |
| Laundry Room |
☐ Clean behind washer & dryer ☐ Empty lint trap ☐ Wipe utility sink ☐ Sweep floor ☐ Remove leftover detergent |
| Garage & Outdoor Areas |
☐ Sweep garage ☐ Remove trash ☐ Dispose of paint/chemicals properly ☐ Sweep patio ☐ Empty outdoor storage ☐ Remove personal belongings |
Common Reasons People Lose Their Security Deposit
One of the biggest misconceptions about moving out is assuming a quick vacuum and wiped countertops are enough.
While every lease is different, landlords commonly deduct cleaning costs when a property is left noticeably dirtier than its original condition.
Some of the most common issues include:
- Grease inside the oven
- Dirty refrigerator shelves and drawers
- Food residue inside cabinets
- Soap scum and mildew in bathrooms
- Dust on baseboards and window sills
- Pet hair embedded in carpets
- Trash left behind
- Forgotten belongings in closets, garages, or storage areas
A thorough move-out cleaning helps reduce the likelihood of these issues delaying the return of your security deposit.
Moving Day Essentials
After weeks of planning, decluttering, packing, and cleaning, moving day is finally here. While most of the heavy lifting should already be done, a little preparation can make the day itself much smoother.
Pack an Essentials Bag
Instead of digging through boxes after a long day of moving, pack a separate bag or small box with everything you’ll need during the first 24 hours.
Keep this bag with you instead of loading it onto the moving truck so it’s always within reach.
Do One Final Walkthrough
Before locking the door for the last time, walk through every room to make sure nothing has been overlooked.
Check:
- Cabinets and drawers
- Closets
- Garage and storage areas
- Refrigerator and freezer
- Outdoor spaces
- Mailbox
Once everything has been removed, take timestamped photos of each room. These photos can help document the condition of the property if questions arise later.
Confirm the Basics at Your New Home
After arriving, focus on getting the essentials in place before unpacking everything.
Start by:
- Confirming utilities are working
- Checking smoke and carbon monoxide detectors
- Locating the water shutoff valve and electrical panel
- Assembling beds first
- Unpacking your essentials box
You don’t have to unpack the entire house on day one. Getting the basics set up allows you to settle in comfortably while unpacking the rest at your own pace.
Final Note: Move Out of State With Confidence
Moving out of state involves much more than simply packing boxes. Creating a realistic timeline, updating important documents, and every step plays a role in making your move less stressful and more organized.
Starting early gives you the flexibility to work through each task without feeling rushed. It also helps ensure your current home is left in excellent condition, whether you’re preparing for a landlord inspection, welcoming new owners, or simply closing one chapter before beginning another.
Scheduling a professional house cleaning before unpacking can make settling in even easier. Starting with freshly cleaned floors, bathrooms, kitchens, and high-touch surfaces means you can focus on organizing your new home instead of cleaning it first.
No matter where you’re headed, a little preparation goes a long way. By following this guide and tackling one step at a time, you’ll be well on your way to a smoother move and a fresh start in your new home.
FAQ
Moving Out of State Questions
Begin planning at least six to eight weeks before moving day whenever possible. Starting early gives you enough time to declutter, book movers, transfer utilities, update important documents, and complete a thorough move-out cleaning without feeling rushed.
Deep cleaning is usually most effective after furniture and boxes have been removed. Empty rooms provide easier access to baseboards, flooring, cabinets, and the spaces behind appliances, making it easier to clean thoroughly before your final walkthrough.
Not always. If you have the time and plan to clean the property thoroughly yourself, you may not need professional help. However, many homeowners and renters choose professional move-out cleaning to save time, reduce stress, and prepare the home for inspections, buyers, or new occupants.
While no cleaning service can guarantee the return of your security deposit, leaving the property clean and well-maintained can help reduce deductions related to cleanliness.
Be sure to review your lease agreement so you understand your landlord's expectations before moving out.
Most landlords expect the property to be returned in a condition similar to when you moved in, excluding normal wear and tear. This typically includes cleaned appliances, bathrooms, cabinets, flooring, windows, and the removal of all personal belongings and trash.
The time required depends on the size and condition of the home. A small apartment may take several hours, while a larger house with multiple bathrooms, appliances, and extensive cabinetry can take most of the day. Starting after the home has been emptied usually makes the process faster and more efficient.
Most people find it easier to schedule their deep cleaning after the moving truck has been loaded. Once furniture has been removed, it's much easier to reach floors, baseboards, cabinets, and other areas that are difficult to clean during everyday living.